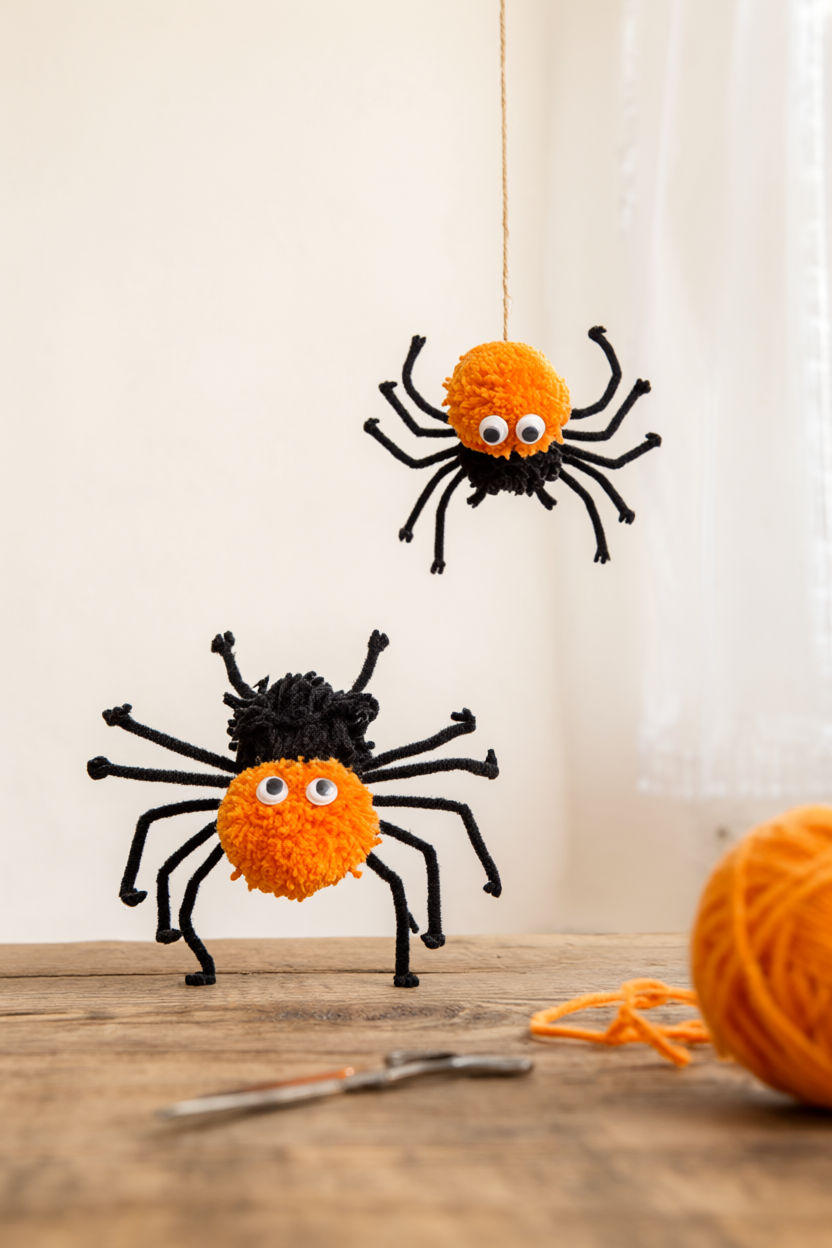
Ready to turn a leftover ball of yarn into a whole colony of friendly Halloween pom-pom spiders? They are one of the easiest homemade Halloween decorations you can make, and they are soft and silly rather than scary. Honest time: about 20 minutes for your first spider, 45-60 minutes for a set of two or three, and no drying or curing wait beyond the 10 minutes it takes the glue to set. A free printable supply list and tick-box checklist is included below.
At a Glance
- Difficulty: Easy and beginner friendly. Ages 8 and up can make one solo; younger kids can help with wrapping and fluffing while an adult handles the hot glue and sharp scissors.
- Hands-on time: About 20 minutes for the first spider, 45-60 minutes for a set of 2-3.
- Drying or curing time: None. The glue sets in about 10 minutes and the spider is ready to use right away.
- Cost level: Low. One skein makes 6-8 spiders (about 25 yd / 23 m of yarn per spider), so it is a great stash buster.
What You’ll Need
- Worsted-weight yarn in orange, black and/or purple, 1 skein each (about 25 yd / 23 m per spider; one skein makes 6-8 spiders)
- Sturdy cardboard rectangle about 4 x 6 in, 1 per crafter (wrapped along the 4-inch side)
- Chenille pipe cleaners, black or coordinating, 4 per spider
- Googly eyes, about 10 mm, 2 per spider (white and black felt scraps also work)
- Hot glue gun plus 2-3 glue sticks (adult use) and tacky glue as the kid-safe alternative
- Sharp small scissors for cutting yarn loops, plus kid scissors
- Cotton string or yarn, 6-inch pieces, 1 per spider for the hanging loop
- Optional: small treat bags, or a magnet disc for a fridge-magnet version
Step-by-Step Instructions
- Cut a 4 x 6-inch rectangle of sturdy cardboard. Wrap the yarn around it along the 4-inch side about 100 times (150 for a bigger spider), keeping the wraps snug and side by side.
- Slide the wrapped bundle off the cardboard, holding the middle so the loops stay stacked together. Work slowly; the loops tangle easily.
- Tie a 12-inch piece of yarn tightly around the middle of the bundle and knot it twice. This center tie holds the spider together, so pull it snug before you let go.
- Cut through all the loops on both ends with sharp scissors, then fluff the pom-pom into a ball and snip long strands until it looks round, about 1-2 minutes of trimming. The sharp scissors are an adult job.
- Cut 4 pipe cleaners in half to make 8 legs, and bend a small foot up at the end of each leg.
- Spread the pom-pom strands and push the straight end of each leg in right beside the center tie, 4 legs on each side. Add a dab of hot glue if a leg feels loose; hot glue is for adults, and tacky glue is the kid-safe alternative.
- Bend and adjust the legs so all 8 feet sit level. The spider should stand on the table without tipping.
- Glue 2 googly eyes to the front with hot glue (adult) or tacky glue (kids), and let the glue set for about 10 minutes. Safety note: keep the spider away from children under 3, because the googly eyes are a choking hazard.
- Cut a 6-inch piece of cotton string with the kid scissors, then tie it to the center tie for hanging, or tuck the spider into a treat bag as a no-candy party favor.
Why Pom-Pom Spiders Are the Easiest Homemade Halloween Decoration
Pom-pom spiders hit the sweet spot for a homemade Halloween decoration: cheap, fast and almost impossible to get wrong. If you already knit or crochet, you likely have half-balls of orange, black or purple worsted yarn in your stash, and one skein makes six to eight spiders, so each one costs pennies. Because there is no drying or curing time, this is a true one-evening project. They are also genuinely kid-friendly: children can wrap yarn, fluff pom-poms, bend pipe cleaners and choose eyes, while an adult takes the two risky jobs of sharp scissors and hot glue. The finished spiders read as soft and silly rather than spooky, a good fit for classrooms, toddler-friendly homes and anyone who prefers a cute Halloween to a scary one.
Variations: Fork-Wrapped Minis, Jumbo Porch Spiders and More
Once you have made one, the same method scales up and down easily. For tiny fork-wrapped minis, wrap yarn around a dinner fork about 40 times and tie the center with thread or a short pipe-cleaner piece; these are sweet cupcake toppers or napkin rings. For a jumbo porch spider, wrap around a larger piece of cardboard or a book and go for 200 or more wraps; the bigger the bundle, the more trimming it needs, but the effect is wonderful. Glow-in-the-dark yarn turns a colony into a friendly night light, and fuzzy yarn such as eyelash or chenille makes plush, hairy spiders. Glue a small magnet disc to the underside instead of a hanging loop, and the spider becomes a fridge magnet that holds the grocery list.
Troubleshooting: Lumpy Pom-Poms, Drooping Legs and Slipping Ties
Most pom-pom problems have simple fixes. Lumpy, uneven pom-poms usually mean the center tie was not tight enough or the trimming was rushed: tighten the tie with a second knot, then trim slowly in small snips all around the ball, rotating it as you go, until the silhouette looks round from every angle. Drooping legs happen when the pipe cleaners sit too shallowly or the pom-pom is too heavy for them; push each leg deeper so it touches the center tie, add a dab of hot glue at the entry point. A slipping center tie should be re-tied with fresh yarn rather than glued, and a drop of glue on the finished knot adds security after re-tying. Stray hot glue strings come off once cool: pull them away with tweezers, or rub the spot with a little petroleum jelly on a cotton swab and pick off the residue.
Care, Safety and Gifting Your Pom-Pom Spiders
These spiders are decorations, not toys, so a little care goes a long way. Spot-clean only: dust with a soft brush or lint roller, and blot sticky spots with a barely damp cloth, then air dry. Never machine wash or soak them, because the glue and pipe cleaners will not survive it. Keep finished spiders away from pets and children under three, since the googly eyes are a choking hazard and curious cats and dogs may treat the fuzzy legs as a chew toy; display them high on a shelf, mantel or doorway. For gifting, tuck a spider into a small treat bag with a few wrapped candies or a pencil, and label the bag: “No tricks, just a little treat, a handmade Halloween spider to hang up at home.” A batch makes a lovely, low-cost classroom or party favour.
Your Free Printable
The two-page PDF contains exactly this. Page 1: What You’ll Need, a tick-box checklist of all 9 materials and tools with exact quantities. Page 2: Step by Step, 10 tick-box steps from wrapping the yarn to the hanging loop. Print it, tick the boxes as you gather your supplies, and keep it on the table while you craft.
Have fun building your own little colony of pom-pom spiders. If you make a jumbo porch spider or a set of glowing minis, those are the versions we would love to hear about. Happy Halloween!