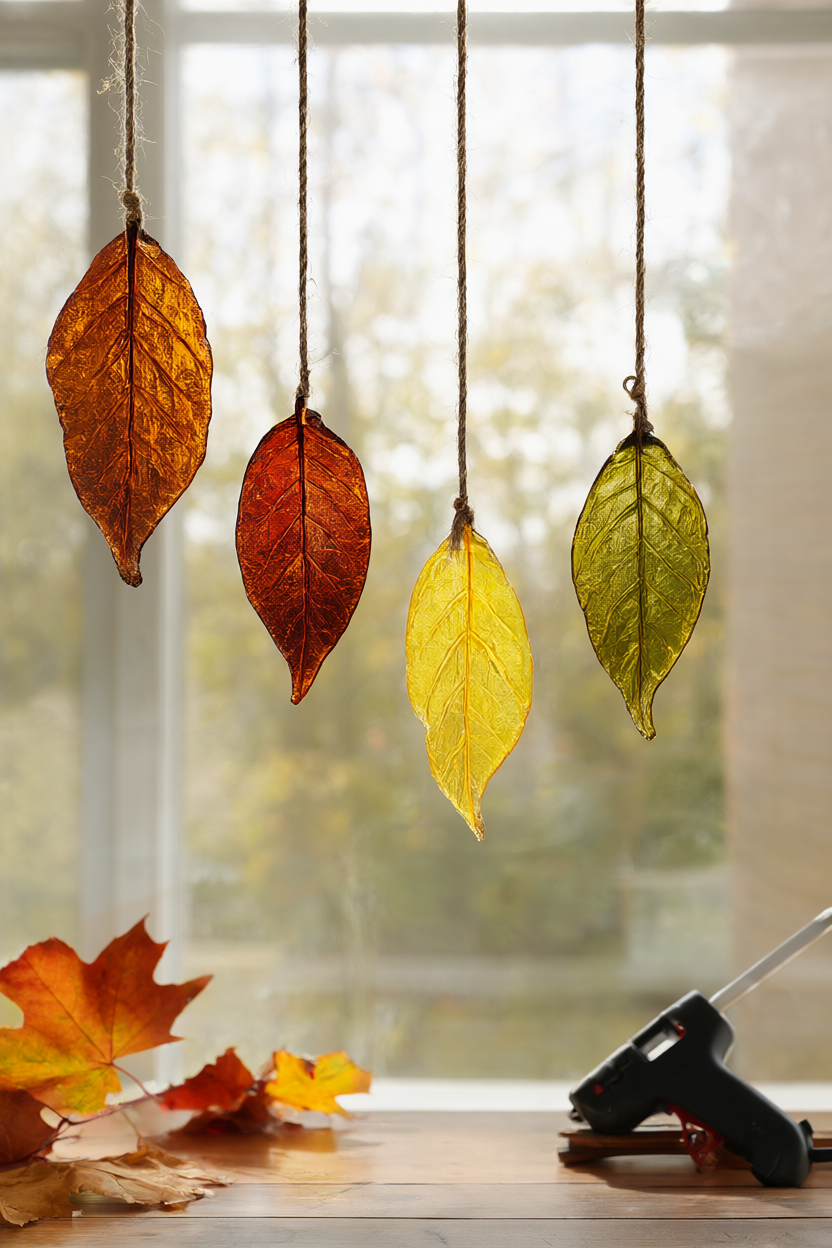
Looking for a fall craft that glows like real stained glass but costs almost nothing and needs no kiln, no glass cutter, and no special skills? These hot glue fall leaf suncatchers are made by tracing a leaf outline in clear glue, filling the sections with translucent colored glue sticks, and peeling the finished piece right off the parchment. The honest time is about 45 to 60 minutes of hands-on work for three or four leaves, plus 10 to 15 minutes of cooling per leaf, and there is no drying or curing wait at the end. A free printable supply list and step checklist is included below, so you can gather everything and follow along without a screen.
At a Glance
- Difficulty: Easy and beginner-friendly. A low-temp glue gun is required, and hot glue can burn, so an adult should handle the gun and supervise younger children.
- Hands-on time: About 45-60 minutes for 3-4 leaves (10-15 minutes per leaf if you work assembly-line style).
- Cooling time: 10-15 minutes per leaf. No drying or curing time.
- Cost level: Low. The only real purchase is a low-temp mini glue gun and a few packs of clear and colored glue sticks; most of the rest is already in a craft drawer.
What You’ll Need
- Low-temp mini hot glue gun, 1
- Clear glue sticks (match your gun size), 6
- Translucent colored glue sticks (orange, red, yellow, green), 8-10
- Parchment or wax paper, 2-3 sheets
- Leaf outlines (printed or hand-drawn), 3
- Real fall leaves for tracing, 3-4 (optional)
- Painter’s tape, 1 roll
- Scissors, 1 pair
- Toothpicks, 5
- Twine, 36 in (90 cm)
- Suction-cup hooks, 3-4
Step-by-Step Instructions
- Clear a heat-safe table and tape one sheet of parchment over a leaf outline so the printed lines show through. Keep a scrap sheet of parchment nearby for testing glue flow and for clearing the tip later, and set out the twine and scissors so everything is within reach.
- Plug in the low-temp glue gun and heat it for 5 minutes with a clear stick loaded. Never touch the metal tip or the molten glue, because hot glue burns; kids need adult supervision for this entire project, and a low-temp gun is the safest choice for small hands.
- Trace the leaf outline with a thin, steady bead of clear glue, then add the center vein and the side veins. Move the tip slowly for smooth lines instead of squeezing harder, which only makes blobs and strings.
- Switch to a colored stick and squeeze a thick zigzag or spiral inside one section between veins. When you change colors, waste a little glue on the scrap sheet first so the shades do not muddy in the tip.
- Fill the remaining sections with different fall colors, keeping the glue inside the clear outline so the leaf keeps a clean border. For softer blends, drag a toothpick through the warm glue for a second or two, carefully, since it is still hot.
- Let the leaf cool flat for 10-15 minutes; it turns slightly hazy as it sets, which is exactly what gives it the frosted stained glass look. Start the next leaf while this one cools, and you can finish three or four in about an hour.
- Peel the leaf off the parchment slowly from one tip. If it resists, slide a flat spatula or butter knife underneath, and never pour glue directly on regular paper, where it sticks permanently and will not peel.
- Tie a 4-inch twine loop, knot it, and glue the knot to the back top of the leaf; hold for 30 seconds while it sets. Hang the leaves at different heights on a sunny window with suction-cup hooks, and dust them with a dry cloth when they need freshening up.
Why Hot Glue Suncatchers Are the Perfect Fall Craft
No kiln, no real glass, and no expensive kit: a low-temp glue gun turns out faux stained glass in a single sitting. The clear outline acts like the leading in a real stained glass window, and the translucent colored sticks do the rest, so even a first-timer gets a finished piece in about 15 minutes per leaf. The supplies are cheap and easy to find at any craft store, the technique is forgiving, and mistakes can be reheated or trimmed, which makes this a good project for mixed-age groups and craft nights. It is also a lovely way to use the leaves you collect on an autumn walk: trace a real maple, oak, or birch leaf and you have a keepsake that looks handmade in the best way. Hang three or four at different heights and a dull window becomes a little autumn gallery that changes with the light.
Shape and Color Variations to Try
Leaves are just the start. Swap the outline for a ghost, pumpkin, moon, or star and use the same method for Halloween or winter windows, or cut a simple heart for a Valentine version. Press a pinch of glitter glue stick into a section before it cools for a sparkly accent, or layer two thin colors in one section for a two-tone blend that looks poured. If you want a bigger display, string five or six leaves together with twine and a few knots to make a garland, or glue small leaves around a wooden hoop for a hanging mobile. In January, switch to icy blues, whites, and silver sticks and cut snowflake outlines; the same 45-minute method works all year.
Troubleshooting: Peeling, Bumpy Beads, and Muddy Colors
- Won’t peel off the parchment: let it cool longer, then start at one tip and peel slowly; a flat spatula or butter knife helps with stubborn spots.
- Bumpy, uneven beads: you are squeezing too hard or moving too fast; move the tip slowly and let the glue flow on its own.
- Muddy colors: clear the tip on scrap parchment between sticks and waste a little glue before filling a new section.
- Warping or curling: keep each leaf under about 5 inches across and let it cool flat; if a tip lifts, press it flat with a book for a minute.
Care, Display, and Gifting Ideas
Hot glue suncatchers are sturdy but not heatproof. Wipe them with a dry cloth only, keep them away from high heat such as a car dashboard or a hot radiator, and bring them indoors before a hard freeze if they live on a porch window. They make wonderful little gifts: tie a finished leaf to a folded card with twine, add a short note, and you have a handmade fall present for a teacher, a neighbor, or a host. For a sweet family project, have each person trace and sign the back of their own leaf with a fine permanent marker, then hang the set together as a keepsake for the season.
Your Free Printable
The free printable is two pages. Page 1 is a What You’ll Need checklist with all 11 supplies and their quantities, so you can gather everything before you sit down. Page 2 is a Step by Step checklist with the eight short actions, from taping the parchment to hanging the finished leaf, so you can tick off each stage as you go. Print it, keep it on the table, and let the kids take charge of the checkmarks while you run the glue gun.
That is the whole project: gather your supplies, warm up the glue gun, and in one cozy afternoon you will have a window full of glowing fall leaves. If you make a set, try mixing in a few non-leaf shapes and tell us which colors you chose.