Air-dry clay magnets are the rare craft that looks boutique-bought yet costs just a few dollars and needs no oven, kiln or special skills. In this tutorial you will roll, cut, paint and seal a set of pretty fridge magnets in about an hour of hands-on time, plus patient waiting while the clay slowly dries. A free printable supply list and step checklist is included below, so you can gather everything before you start.
At a Glance
- Difficulty: Beginner. No special skills needed, but keep the small magnets and the sealer away from young children, and let an adult handle any hot glue.
- Hands-on time: About 1 hour, plus two short 30-minute waits while the paint and sealer dry.
- Drying and curing: 24 to 48 hours for the clay (up to 72 hours for thick shapes), plus a 24-hour glue cure before the magnets go on the fridge.
- Cost level: Low. One 1 lb block of clay and a 12-pack of magnets make a full set, and you probably own the paints, brushes and sealer already.
What You’ll Need
- White air-dry clay, 1 lb (454 g) block: makes a large set, so wrap leftovers airtight.
- Round disc magnets, 10-12 mm: 1 per magnet, so a 12-pack covers a full batch.
- Acrylic craft paint in 3-5 colors: small bottles are plenty.
- Matte acrylic sealer or varnish: 1 small bottle or spray can.
- Strong multi-surface craft glue: 1 tube, or a low-temp glue gun.
- Rolling pin or smooth glass bottle: 1.
- Wax paper or baking paper: a few sheets.
- Mini cutters (flower, heart, circle): 1 set.
- Toothpicks: 2-3.
- Small cup of water and a soft cloth: 1 of each.
- Flat tray or baking sheet: 1.
- Fine sandpaper, 220 grit: 1 sheet.
- Small paintbrushes: 1 flat and 1 detail.
Step-by-Step Instructions
- Line a tray and your worktable with wax paper, and keep the clay bag sealed between uses so it does not dry out.
- Knead a golf-ball-size piece of clay for 1-2 minutes until it feels smooth and pliable.
- Roll an even slab about 0.5 cm (1/4 inch) thick between two sheets of wax paper. A smooth bottle works if you have no rolling pin, and even thickness stops cracks later.
- Cut your shapes. Press the mini cutters straight down, lift them, and peel away the scraps. Keep each shape under about 5 cm (2 in) and re-roll scraps once or twice.
- Smooth the edges with a damp fingertip or a dampened soft cloth, then add dots or lines with a toothpick while the clay is still soft.
- Dry the shapes flat on the tray at room temperature for 24 to 48 hours, up to 72 hours for thick pieces, flipping them after 24 hours. They are done when they are rock-hard, matte and no longer cool to the touch. Do not oven-dry or rush this step.
- Sand any rough spots with 220-grit sandpaper and wipe off the dust with a soft, dry cloth.
- Paint a base coat, let it dry for about 30 minutes, then add a second thin coat plus details like dots, stripes or little leaves.
- Seal the pieces with two thin coats of matte sealer in a well-ventilated area or outdoors, following the label’s dry time, usually 30 minutes between coats and a full cure overnight.
- Glue one magnet to the back of each piece with strong craft glue, or low-temp hot glue with adult help only, and let it cure as the label directs, usually 24 hours.
- Test the magnets on the fridge; a stronger 10-12 mm disc magnet holds better than a thin craft magnet on textured doors. Tie a set with a note if you are gifting, and keep small magnets well away from young children.
Why This Clay Magnet Craft Works So Well
Air-dry clay is forgiving. It softens in your hands, takes any shape a small cutter can make, and hardens on its own without an oven or kiln. That makes this project a perfect way to use up leftover clay from other projects, or a great reason to open a fresh block.
The whole set costs just a few dollars, because a single block of clay and a small pack of magnets are the only real purchases. Everything else, from the paint and brushes to the sealer and glue, is standard craft-drawer material. It is also quick to learn: if you can roll cookie dough, you can roll clay.
Because a fridge magnet is small, it is a low-pressure way to practice painting details. Mess up a little leaf? Paint over it. Nobody will ever know, and you will still have a useful magnet at the end.
Variations and Design Ideas
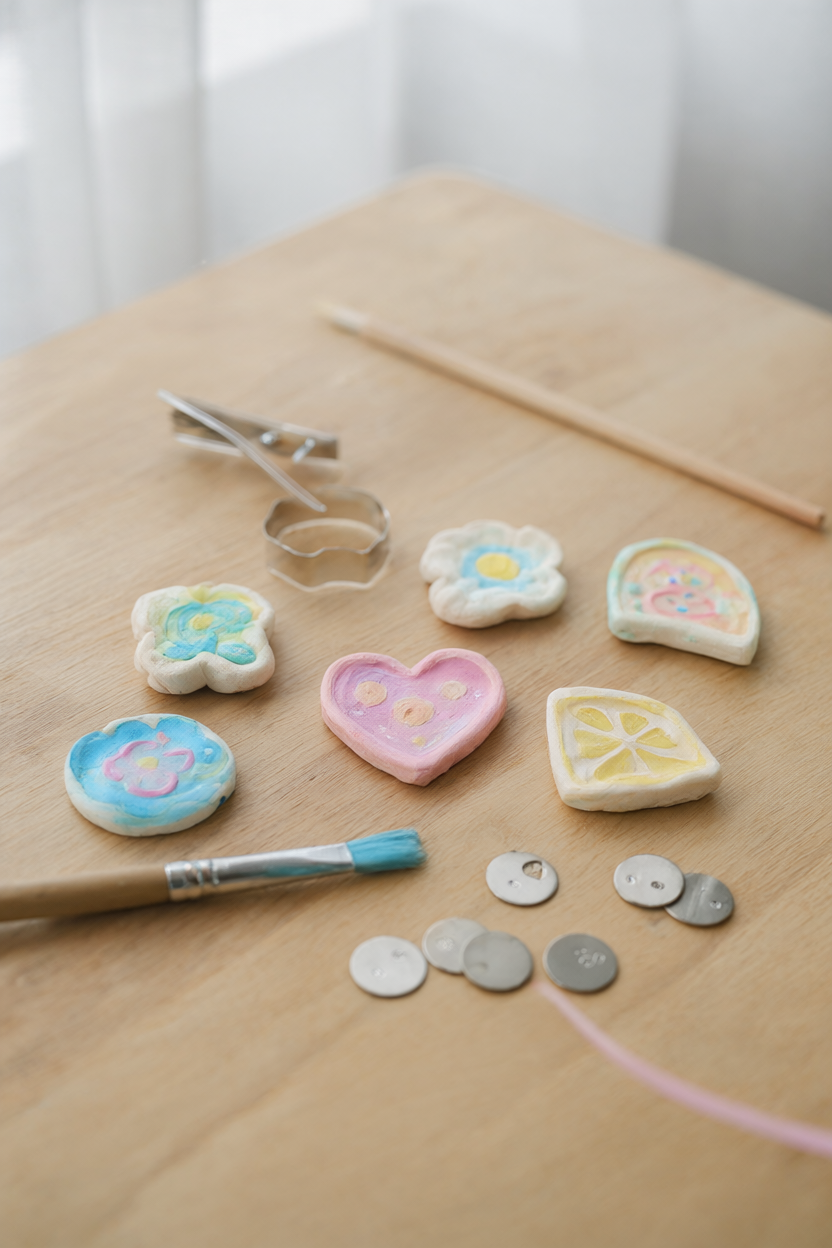
Once you have the basic technique down, the shapes are yours to play with. Cut citrus slices and add tiny segment lines in white paint, or press leaf veins into the clay with a toothpick. Roll small clay balls into flattened flowers with a dot in the center, or stamp simple initials for a personalized gift. A speckled finish is easy: flick diluted paint from an old toothbrush, or add tiny dots with a fine brush. Seasonal mini sets are fun, too, pastel eggs in spring, pumpkins in autumn and snowflakes in winter, all from the same three or four paint colors.
Troubleshooting: Cracks, Warping and Weak Magnets
Cracks usually mean the clay dried too fast or the slab was uneven. Keep the thickness consistent, dry the pieces away from direct sun and heaters, and remember that slower is safer. A warped magnet was probably dried on a lumpy surface, so dry the shapes flat on a tray and flip them at the 24-hour mark. If a magnet feels weak or slides down the fridge, rough up the back of the clay with sandpaper and re-glue it with a stronger, more flexible glue, or switch to a larger disc magnet. Paint that peels is usually unsealed on both sides; a thin coat of matte sealer on the front and back locks the color in.
Care, Safety and Gifting
Once a magnet is finished, treat it gently. Wipe it with a dry or barely damp cloth, never soak it and never put it in the dishwasher, because water can soften the clay and lift the sealer.
Safety matters here: small magnets are a serious choking hazard, so keep finished magnets and loose magnet discs away from babies, toddlers and pets, and skip this project with very young makers. Use the sealer in a ventilated area, and let an adult handle any hot glue.
These magnets make lovely teacher, hostess or neighbor gifts. Tie three or four together with twine, add a handwritten card, and you have a thoughtful handmade present for just a few dollars.
Your Free Printable
The free printable has two pages. Page 1 is a “What You’ll Need” checklist with all 13 materials and tools, from the clay and cutters to the magnets, glue and sealer, so you can shop and set up without scrolling. Page 2 is a “Step by Step” checklist with 11 short actions, from kneading and rolling to drying, painting, sealing and gluing on the magnets, so you can tick off each stage as you go.
Print the checklist, gather your supplies and make a set of clay magnets this weekend. Once the first batch is on your fridge, you will already be planning the next one.