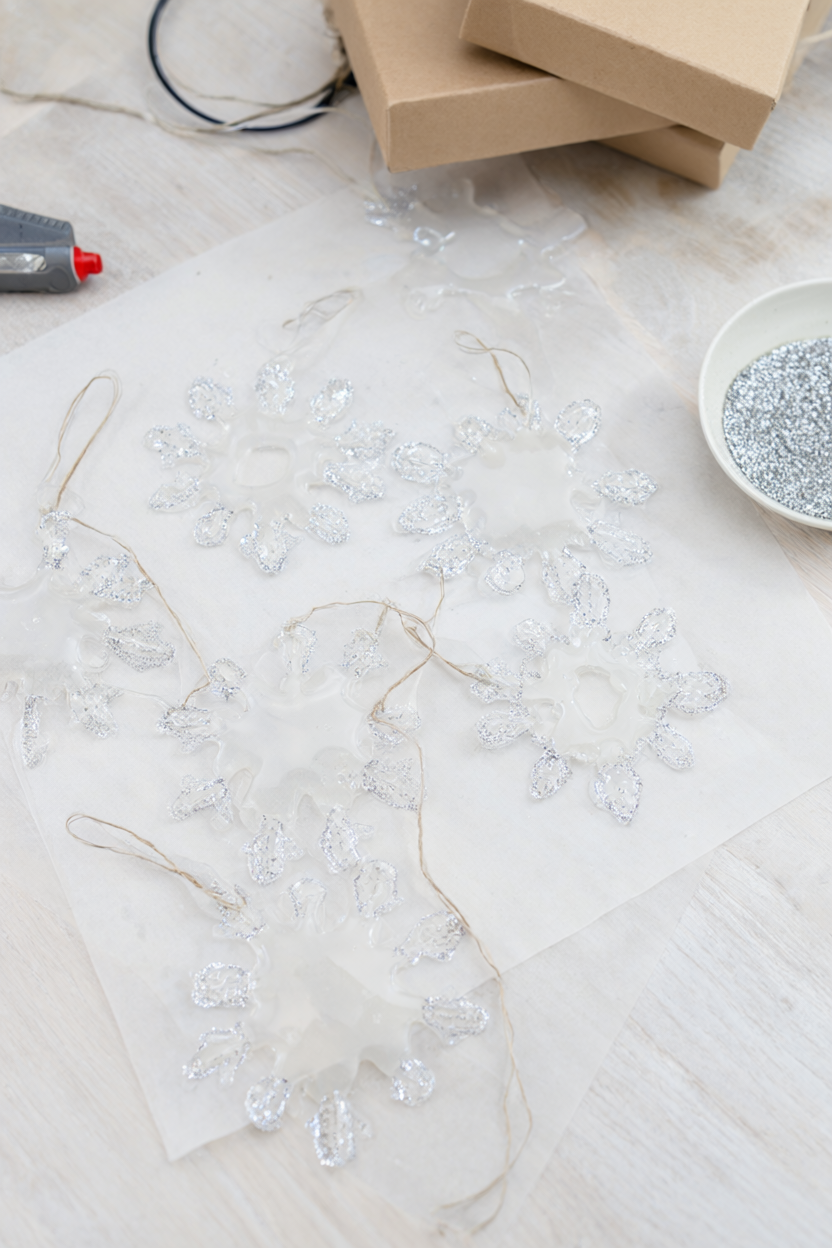
You can make six sparkling snowflake ornaments with one tool, a little glitter, and about thirty minutes of hands-on time. Hot glue snowflakes are a forgiving first project: the lines do not have to be perfect, and every one comes out a little different, which is what makes a handmade tree feel warm. Plan on 30 minutes of hands-on work for six ornaments plus about 10 minutes of cooling, with no drying or curing time, and a free printable supply list is included below.
At a Glance
- Difficulty: Beginner. The low-temp glue gun is still hot, so kids need adult supervision.
- Hands-on time: About 30 minutes for six ornaments.
- Drying or curing time: None. The glue cools for about 10 minutes and the ornaments are ready.
- Cost level: Low. The glue gun, glue sticks, glitter, twine, and parchment are the main supplies.
What You’ll Need
- 1 low-temp hot glue gun
- 8 clear or white glue sticks (one per ornament, plus spares)
- 6 sheets of parchment paper (or a silicone mat)
- 1 snowflake template, 6 to 8 inches (print one or draw it)
- 2 tbsp fine silver or iridescent glitter
- 1 small bowl for excess glitter
- 48 inches of 1/8-inch ribbon or cotton twine (8 inches per ornament)
- 1 pair of scissors
- 1 pair of tweezers or 1 toothpick
- 1 baking sheet or cutting board
- 1 roll of masking tape
Step-by-Step Instructions
- Print a simple six-arm snowflake template about 6 inches across, or draw one on plain paper. Tape it to a baking sheet or cutting board, lay parchment paper on top, and tape the corners so the paper lies flat and the lines show through.
- Heat a low-temp hot glue gun for 3 to 5 minutes. Starting at the center, trace the six main arms with an even 1/8-inch bead of glue, then add two short branches to each arm, working one arm at a time so the glue does not cool before you finish. Keep fingers away from the nozzle, and let an adult handle the gun when kids are helping, because a low-temp gun is still hot.
- While the glue is still wet, fold an 8-inch piece of twine in half, press the loop into the tip of the top arm, and cover the ends with a small dab of glue. Check that the loop stands upright before the glue sets.
- While the glue is still warm and tacky, hold the snowflake over a small bowl and sprinkle fine glitter along the lines, then tap off the excess back into the bowl. Work within about 60 seconds of gluing for the best adhesion.
- Leave the snowflake flat on the parchment for 5 to 10 minutes until the glue turns from clear to cloudy white and feels firm. Do not lift it while the center is still soft.
- Peel the snowflake up slowly from an outer tip. If it resists, work a toothpick or the tip of the tweezers under the edge and lift gently. Trim any glue strings with scissors, keeping the blade pointed away, and re-glue the loop if it pulled loose.
- Tie the loop to a tree branch, hook, or gift package. Store the ornaments flat between sheets of parchment in a rigid box, away from heat and direct sun.
Why Make Hot Glue Snowflakes This Christmas
Hot glue snowflakes ask for very little: one tool, a template, and a spare half hour. There is no mixing, no oven, and no overnight drying, so you can start after breakfast and have ornaments on the tree before lunch. The cost is low as well, since one glue gun and a handful of glue sticks make six ornaments, and most homes already have scissors, tape, and twine. Nothing needs to be ordered or measured, so the project fits easily into a busy December evening.
The look is quietly modern. Clear glue dries to a translucent, cloudy white that catches light, and a dusting of silver or iridescent glitter softens each arm. That makes these a natural fit for minimalist or Scandinavian-style trees, where a few pale, textural ornaments do more than a crowded branch.
Because each snowflake is drawn by hand, no two are identical. Small wobbles read as character rather than mistakes, and beginners can finish a presentable ornament on the first try without any special tools.
Variations: Color, Metallic Glue, and Mini Snowflakes
Colored or metallic glue sticks change the mood. A smoky gray or deep blue reads as icy, while gold or copper metallic sticks look warmer and more dressed up. Keep one stick per color so the shades stay clean.
Glitter is the simplest upgrade. Fine silver or iridescent suits the pale palette, while gold glitter looks rich against a green tree. Sprinkle it on while the glue is warm and tacky, then return the excess to the bowl for reuse.
Pearl bead centers add a small focal point. Press one flat-backed pearl or a tiny cluster into the center while the glue is still soft, before it skins over. For faster gifts, make 3-inch minis and tie them to gift tags or napkin rings.
Layered two-tone designs take a little more care: make one snowflake, let it cool, then trace a smaller snowflake on top in a contrasting color, adding extra glue where the lines cross so the layers hold.
Troubleshooting: Stringy Glue, Thin Arms, and Stuck Snowflakes
Stringy glue usually means an overheated gun or a dirty nozzle. Unplug the gun for a minute, wipe the tip with a paper towel while it is warm, and move more slowly, pausing at the end of each line to let the string catch.
Thin arms snap when too little glue went down or the bead was stretched as the gun moved. Use an even 1/8-inch bead and keep the nozzle close to the parchment. To repair a break, warm both ends with the tip of the gun and press them together for a few seconds.
Sticking to paper is usually a paper problem. Printer paper and wax paper grab the glue, so use parchment paper or a silicone mat and tape the corners flat. If a finished snowflake still resists, use tweezers or a toothpick to loosen an outer tip.
Cloudy centers are normal as the glue cools. A center that stays soft after 10 minutes simply had a thick bead, so give it more time instead of lifting it early.
Loops pull out when the twine went into glue that had already skinned. Reheat the tip, push the loop back in, and add a small dab of fresh glue around the base.
Care, Storage, and Gifting Your Handmade Snowflakes
Store hot glue snowflakes flat between sheets of parchment in a rigid box. Loose stacking bends the arms, and a hot attic or a sunny window can soften the glue and distort the shape, so keep the box cool and dry.
For gifting, box a set of six with a length of twine and a short note about the cooling time. Tie one snowflake to each wrapped gift instead of a bow, or thread a few onto ribbon for a simple garland. The ornaments are light enough to tape onto a card or package without weighing it down.
Your Free Printable
The printable has two pages. Page 1 is a “What You’ll Need” checklist with 11 materials and tools and their quantities. Page 2 is a “Step by Step” checklist with 8 short actions, from taping the template to hanging the ornament. Print both, keep them beside your work surface, and tick items off as you go.
Download the PDF, heat the glue gun, and make a set of snowflakes that will still look good when the tree comes down. Try one metallic stick and one shade of glitter first, then decide which suits your tree best.