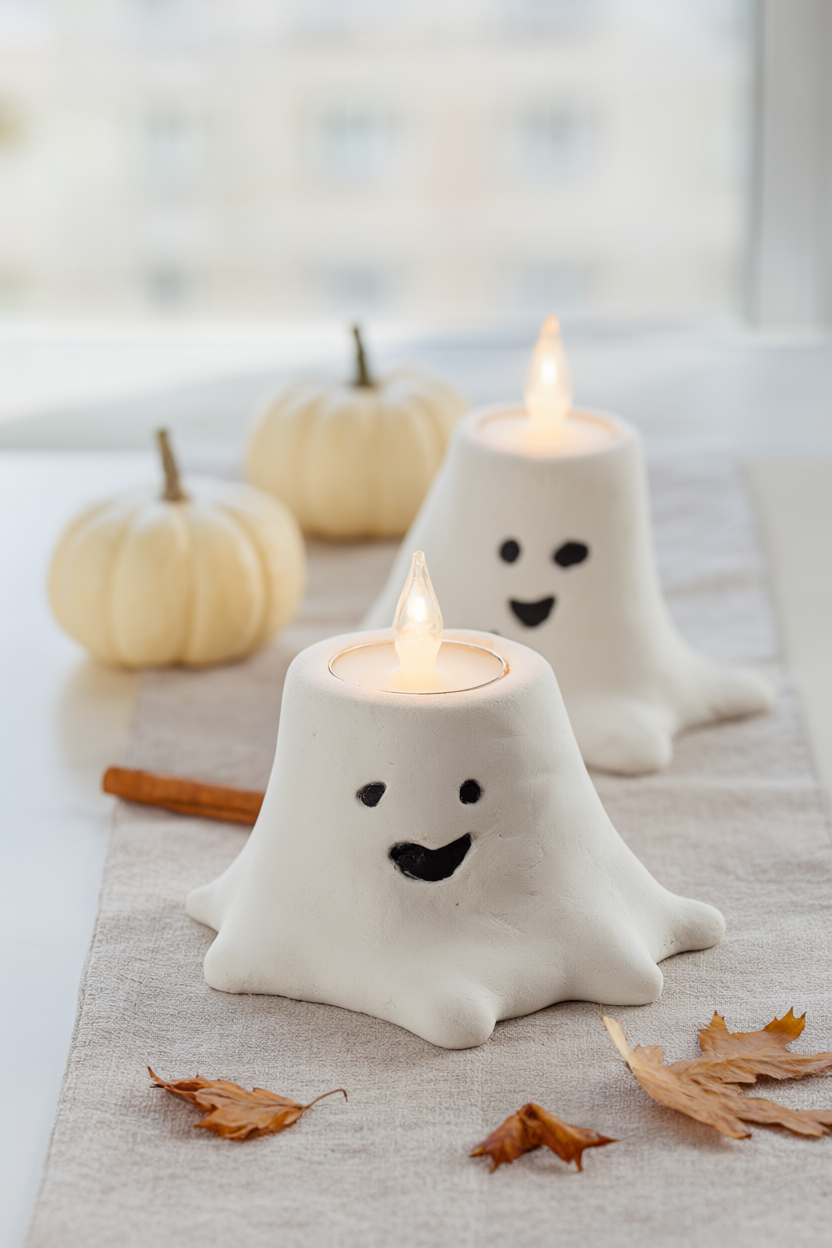
Looking for a Halloween decoration that looks handmade and cozy without a long supply list or much skill? These air-dry clay ghost tealight holders take about 45 to 60 minutes of hands-on time, use one lump of clay, and then dry quietly on the counter while you get on with your week. They are genuinely fun to make, kids can help with the shaping, they glow beautifully on a fall table, and a free printable supply list is included below so you can start today.
At a Glance
- Difficulty: Beginner. No sculpting experience needed.
- Hands-on time: 45 to 60 minutes for two or three holders.
- Drying time: 24 to 72 hours, turning every 12 hours.
- Cost level: Low. One block of air-dry clay plus LED tealights.
What You’ll Need
- Air-dry clay, 1 lb (450 g), white or stone, shapes 2 to 3 ghosts
- LED tealights, 2 to 3, battery-operated
- Wax paper or parchment paper, to cover your table
- A straw and a pencil, to press the face
- A small bowl of water plus a damp cloth or sponge
- A small cup or jar lid, to form the tealight seat
- Black acrylic paint and a small brush, optional
- Fine sandpaper, 220 grit, optional
Step-by-Step Instructions
- Cover your table with wax paper. Knead the clay for about a minute until it is soft and smooth. If the surface cracks, add a few drops of water and keep kneading until it is pliable.
- Roll the clay into a ball about the size of a tennis ball; a 1 lb block makes two or three ghosts at this size. Shape it into a tall teardrop with a rounded top and a slightly narrower base.
- Press the bottom flat on the wax paper so the ghost stands alone, then pinch the bottom edge outward all the way around into a soft wavy skirt. This hides fingerprints and gives the base a finished look.
- Press an LED tealight gently into the top to make a shallow recess, then remove it. For a deeper, neater seat, press a small cup or jar lid into the clay first; the tealight should sit flush and stable.
- Press two small holes with the end of a straw for the eyes, then press the pencil tip in with a gentle twist for a small oval mouth. Leave the face blank if you would rather paint it after drying.
- Smooth fingerprints and small cracks with a damp fingertip. Optional: carve initials or a date into the base with the pencil tip.
- Air-dry the ghosts on wax paper for 24 to 72 hours, turning each one every 12 hours so they dry evenly. They are ready when they feel light and hard with no cool spots on the base.
- Paint the eyes and mouth with black acrylic paint if needed and let dry 20 to 30 minutes, then set an LED tealight in the seat. Safety: use LED tealights only, because a real flame can crack air-dry clay, and keep the button batteries inside them away from young children.
Why Air-Dry Clay Ghosts Are the Easiest Halloween Decor You Can Make This Fall
Air-dry clay is the most forgiving craft material there is. It needs no kiln, no oven, and no sculpting experience: if you do not like a shape, mist it with water, reshape it, and start again. It is inexpensive, quiet to work with, and easy for kids to handle, which makes these ghosts a lovely family project for a rainy October afternoon. The finished holders look like the soft, matte ceramics sold in home stores, but they cost only a few dollars each. Because the light is an LED, you get a cozy flicker with none of the fire worry, and two or three ghosts on a mantel instantly read as fall. If you have never used air-dry clay before, this is a perfect first project: the ghost shape is meant to be slightly uneven, so every wobble looks intentional.
Variations: Pastel Ghosts, Glow-in-the-Dark Ghosts, and a Whole Ghost Family
Once you have made one ghost, the variations are endless and almost free. For pastel ghosts, knead a pea-sized drop of acrylic paint into the clay before shaping; the color spreads softly and looks lovely next to white ones. For glow-in-the-dark ghosts, mix a spoonful of glow-in-the-dark powder into the clay and let the ghosts charge under a lamp before dark. To make a ghost family, roll balls in three sizes and line them up smallest to largest. Pumpkin-shaped holders are just as easy: shape a round body instead of a teardrop, then pinch shallow vertical ribs from top to bottom. For fall place settings, carve each guest’s name into the base or press a tiny clay tag onto the skirt. Every variation uses the same materials and the same 45-minute rhythm, so you can make a whole themed set in one sitting.
Troubleshooting: Cracks, Wobbly Bases, Slow Drying, and Sticky Clay
Cracks while shaping almost always mean the clay is a little dry. Sprinkle on a few drops of water, knead again, and smooth the crack with a damp fingertip. If a crack appears after drying, fill it with a paste of clay dust and water, let it harden, then sand it lightly. A wobbly base usually comes from pressing the ghost down unevenly: flatten the bottom again while the clay is soft and let it dry on a perfectly flat surface. Slow drying is normal in humid weather or for thick pieces; turn the ghosts every 12 hours, move them to a dry, airy room, and be patient, because rushing the process with a hair dryer can cause cracks. If clay sticks to the table, work on wax or parchment paper and lift the ghost gently. Do not skip the damp-fingertip smoothing at the end, the trick that makes a homemade piece look clean.
Care, Sealing, and Gifting Your Clay Ghost Set
Air-dry clay stays porous after it cures, so treat your ghosts as decorative pieces: keep them out of damp rooms and wipe them with a dry or barely damp cloth instead of washing them. To make them more durable, brush on a matte acrylic sealer once they are fully dry and let it cure for 24 hours. Store the holders wrapped in tissue paper in a sturdy box, away from heavy objects. They also make wonderful handmade gifts. Package two ghosts with a pair of LED tealights, tie the bundle with twine, and tuck in a note that they are decorative only and use LED lights. A simple ghost set given in October feels personal in a way store-bought decor never does, and because the materials are cheap, you can make several sets without stretching your budget.
Your Free Printable
The free printable that comes with this tutorial is short, practical, and made to be used. Page 1, “What You’ll Need,” is an 8-item checklist covering clay, LED tealights, wax paper, the face tools, water, the seat cup, and the optional paint and sandpaper. Page 2, “Step by Step,” is a 9-step checklist that walks you from kneading and shaping through drying and painting to displaying the finished ghost holders. Print both pages, take the supply list to the craft store, and keep the step list on the table while you work so you never have to scroll with clay on your hands.
Grab a block of clay this weekend, pour a cup of something warm, and make a little ghost that glows. Once the first one stands on its own, you will want a whole friendly haunt on your mantel, and the printable keeps the project simple from start to finish.