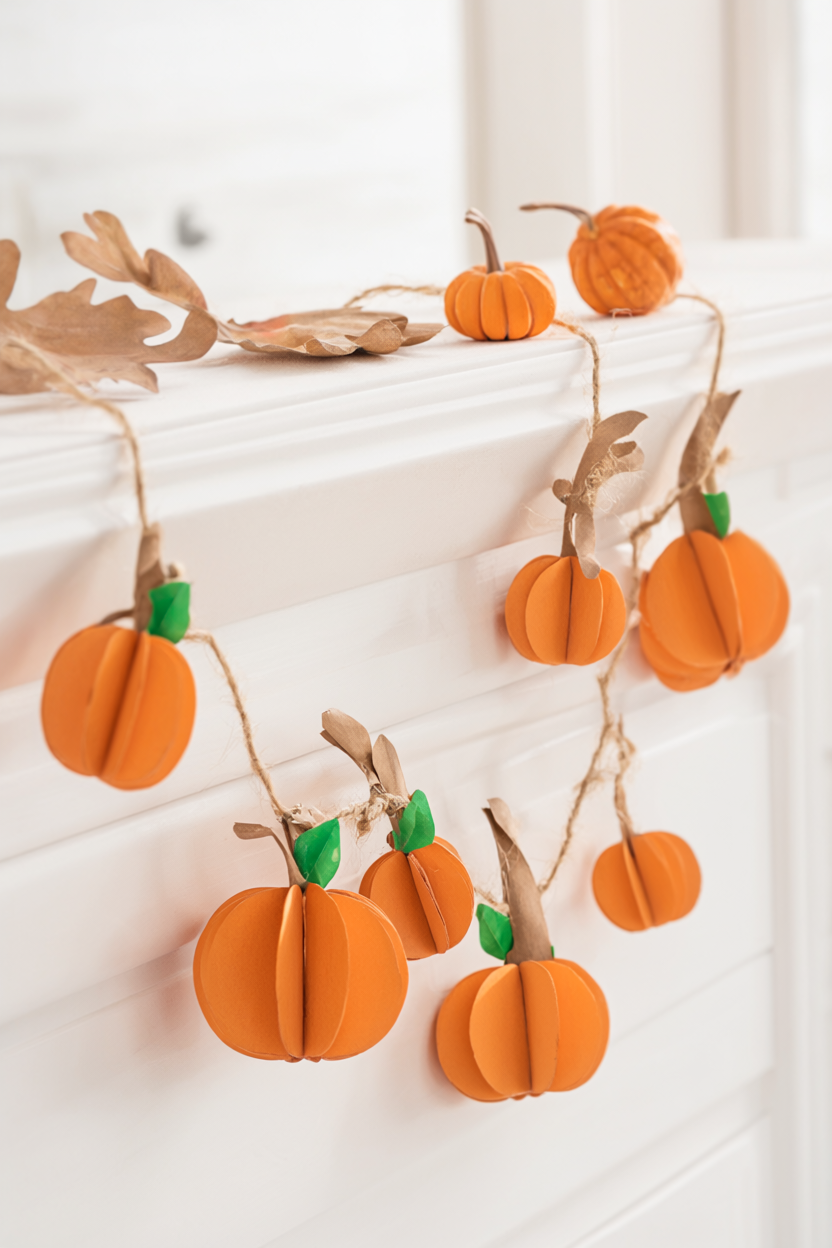
Looking for a fall craft that is cozy, cheap, and truly beginner friendly? This 3D paper pumpkin garland turns plain orange cardstock into a plump little pumpkin patch you can drape across a mantel, shelf, or doorway, with no carving, no clay, and no specialty tools. Expect about 45 minutes of hands-on time for six pumpkins (roughly 7 minutes each), plus 15-30 minutes of drying for the glued stems and leaves, and the free printable supply list included below means you can print everything and craft along in one sitting.
At a Glance
- Difficulty: Beginner, best for ages 8 and up with adult help for scissors and hole punching.
- Hands-on time: about 45 minutes for six pumpkins, roughly 7 minutes each.
- Drying time: 15-30 minutes for the glued stems and leaves; no long cure needed.
- Cost level: low, under $10 for the whole garland using basic cardstock and twine.
What You’ll Need
- Orange cardstock, 9 x 12 in, 6 sheets (one pumpkin each, plus extras for mistakes)
- Green paper or cardstock, 1 sheet (leaves)
- Brown kraft paper, 1 sheet (stems)
- Paper brads (paper fasteners), 12 (two per pumpkin)
- Jute twine, about 12 ft (6 loop pieces plus the garland)
- Scissors
- Hole punch, standard 1/4 in
- Glue stick or white school glue
- Ruler and pencil (optional, for even strips)
- Double-sided tape (optional, for securing garland ends)
Step-by-Step Instructions
- Cut the strips. From each 9 x 12-inch sheet of orange cardstock, cut twelve 1-inch-wide strips along the 9-inch side, so every strip measures 1 x 9 inches. One sheet gives enough strips for one pumpkin (nine strips) plus a few spares for mistakes.
- Punch the ends. Stack the nine strips for one pumpkin and punch a 1/4-inch hole about 1/2 inch from each end, going through the whole stack. If your punch is stiff, work in batches of three and line the holes up by eye. Keep each pumpkin’s strips in its own pile so the lengths stay matched.
- Make the hanging loop. Cut a 10-inch piece of jute twine, knot the ends into a loop, and slip the loop onto one brad so it sits right under the brad head.
- Attach the top. Thread that brad through one end hole of all nine strips with the twine loop on top, then bend the brad’s prongs outward. Fan the strips like a star and check that the loop is centered before moving on.
- Close the bottom. Gather the free ends so the holes line up, push the second brad through them, and spread its prongs outward. Gently bow each strip outward so the middle puffs into a round pumpkin, sliding the strips left or right until the spacing looks even.
- Add the stem and leaves. Roll a 1 x 3-inch strip of brown kraft paper into a tight tube and glue it upright just above the top brad. Cut two simple leaf shapes from green paper, fold each one lightly down the middle, and glue them at the base of the stem.
- Hang and finish. Let the glued stem and leaves dry for 15-30 minutes, then tie the loops onto a long length of twine, spacing the pumpkins 6-8 inches apart, and drape the garland on a mantel, shelf, or doorway. Safety note: this project needs no hot glue and no craft knives, but an adult should still help younger kids with the scissors and the hole punch.
Why This Paper Pumpkin Garland Is Trending This Fall
When you want fall decor without carving pumpkins or buying specialty craft supplies, paper is the answer. Cardstock is cheap, it holds a crease, and it folds into shapes that look much more complicated than they really are. A stack of orange sheets and a handful of brads are enough to make something that reads as real decor, not a kids’ table craft.
Because the garland is made from paper and twine, it also bridges two holidays. Leave it up for Halloween, and it still looks right at home above a Thanksgiving table. Six pumpkins come in under $10, and if cardstock and twine are already in your stash, the project costs almost nothing. That mix of quick, cheap, and genuinely cute is exactly why this garland keeps showing up in fall craft roundups.
Variations: Color, Size, and Displays
Once you have made one pumpkin, the format is easy to remix. Swap the orange for cream, mustard, or deep rust to match a softer fall palette, or use patterned cardstock such as polka dots, plaids, or book pages for a more modern look. Scale the strips down to 1/2 x 4-1/2 inches to make mini pumpkins, then write names on the leaves and use them as place cards for Thanksgiving. For a bigger statement, cut wider strips for jumbo pumpkins and string them across a wide wall. The finished garland is flexible, so drape it on a mantel, thread it through a staircase railing, hang it over a doorway, or pin it above a dessert table. Kids can also make a single pumpkin on a short loop to hang from a doorknob.
Troubleshooting a Lopsided or Torn Pumpkin
Most problems with these pumpkins have simple fixes. If a hole rips, press a small piece of tape over the tear on the back of the strip, punch a fresh hole through the tape, and re-thread the brad; the patch hides inside the finished pumpkin. If the pumpkin looks lopsided, check that all nine strips are the same length and that the holes sit the same distance from each end, since even a half-inch difference can throw off the shape. If it opens too wide or slumps, bend the brad prongs down firmly and rotate the strips so the gaps between them are even. If the twine loop slides around, tighten the knot and place the loop directly under the brad head before bending the prongs back into place.
Care, Storage, Gifting, and Safety
Paper pumpkins are sturdier than they look, but a little care goes a long way. To store the garland, take it down, gently flatten the strips, and lay it in a box with tissue or newspaper between the layers; next fall, simply fluff the strips back into shape. Keep paper decorations away from candles, fireplaces, and other open flames. When crafting with young helpers, supervise the scissors and the hole punch, since both take hand strength and a bit of practice. The garland also makes a lovely gift: tie one up with a ribbon, or pack a kit of pre-cut strips, brads, and twine for a crafty friend who would rather assemble than shop.
Your Free Printable
The printable that goes with this tutorial is two pages and is designed to sit on your worktable while you craft. Page 1 is a “What You’ll Need” checklist with all 10 materials and tools, including exact quantities and sizes. Page 2 is a “Step by Step” checklist with 10 short action steps, from cutting the strips to tying the finished pumpkins onto the garland. Print it, tick items off as you go, and keep it with your fall craft supplies for next year.
That is the whole project: a few sheets of cardstock, a handful of brads, some twine, and about 45 minutes of happy cutting and folding. Make one garland this weekend and you will have fall decor you can reuse for years, from Halloween straight through Thanksgiving.