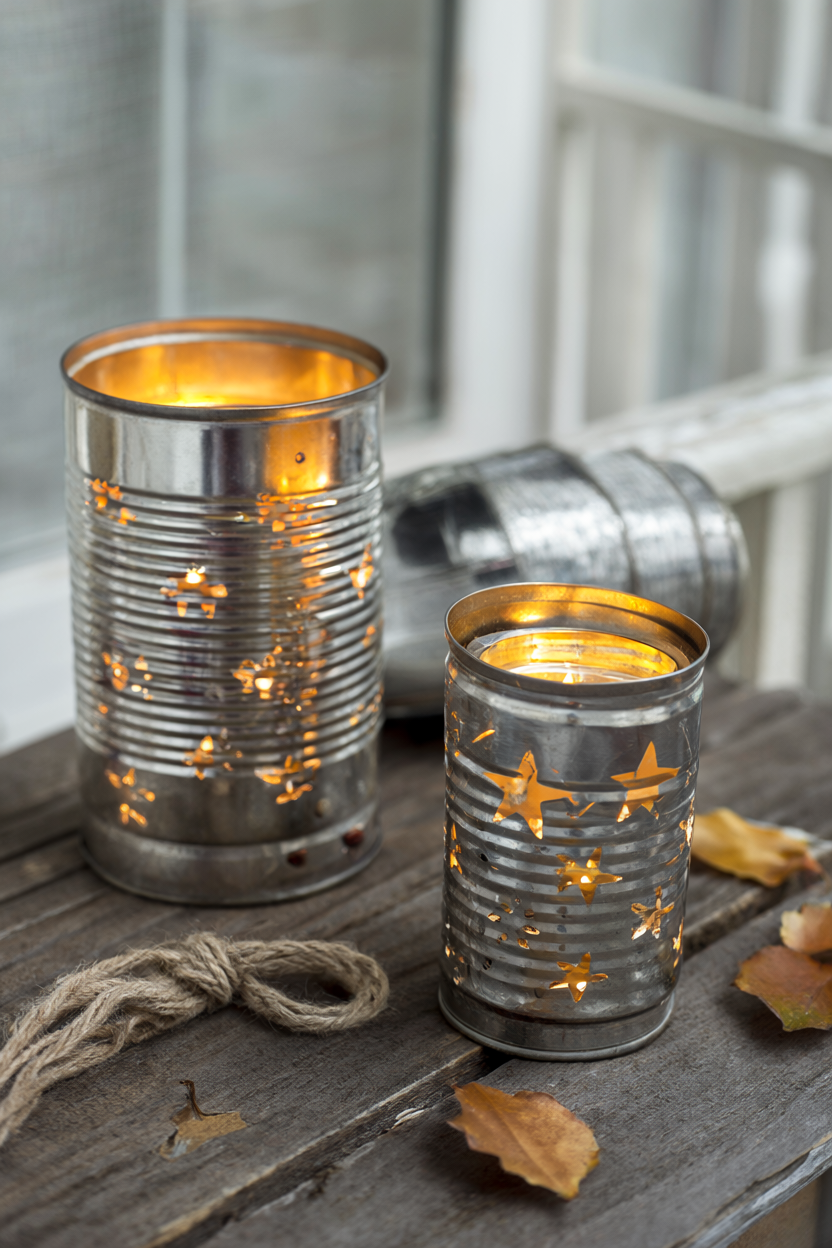
These upcycled tin can lanterns turn two or three empty cans from your recycling bin into glowing, star-punched lights for your porch or windowsill, and they cost almost nothing to make. The punching is satisfying, the patterns are entirely your own, and the warm glow makes a fall evening feel instantly cozier. Plan on about 1 hour of hands-on work plus 3-4 hours of freezing time, and download the free printable supply list and step checklist below.
At a Glance
- Difficulty: Beginner. An adult does the hammering; kids can mark the dots.
- Hands-on time: About 1 hour.
- Waiting time: 3-4 hours of freezing, plus 2-3 minutes to thaw; optional spray paint needs about 1 hour to dry.
- Cost level: Very low. The cans are free and most tools are already in a kitchen drawer.
What You’ll Need
- 2-3 empty tin cans (15 oz size works well)
- 1 can opener (for the top lids)
- Water plus freezer space (cans freeze 3-4 hours or overnight)
- 1 small nail, about 1/16 in (or a craft awl)
- 1 hammer
- 1 pair of work gloves
- 1 old towel or folded cloth
- Masking tape
- 1 fine-tip marker
- 18-20 gauge craft wire, about 12 in per can (for the optional handle)
- Wire cutters and needle-nose pliers
- 2-3 tea lights (LED ones are safest; real ones need adult care and a heat-safe plate or tray)
- Fine sandpaper and optional matte spray paint or sealer (used outdoors)
Step-by-Step Instructions
- Wash and dry the cans. Peel off the label and any glue, then use a can opener to remove the top lid; press or lightly sand the sharp inner edge so it will not cut fingers later.
- Fill and freeze. Fill each can almost to the top with water and freeze for 3-4 hours, or overnight, until the water is solid. The ice keeps the thin metal from denting while you hammer.
- Plan the pattern. Wrap masking tape around the can as a guide and draw your design in dots with a fine-tip marker: a constellation of stars, a simple pine tree, scattered dots, or a small moon.
- Punch the holes. Put on work gloves, set the frozen can on the folded towel, and hold it steady through the towel. Hammer the nail through each marked dot with firm, light taps; keep the holes at least 1/4 in apart and 1/2 in away from the top and bottom edges so the metal does not tear.
- Thaw and dry. Run the can under warm water and wiggle the ice block out; it loosens in 2-3 minutes. Dry the can completely inside and out before moving on.
- Add an optional handle. Cut about 12 in of 18-20 gauge craft wire, bend each end into a small hook with the pliers, hook the ends through two holes near the rim, and twist them closed.
- Finish the metal. Sand any rough hole edges with fine sandpaper and wipe the can clean. For a matte finish, spray-paint or seal the outside in a ventilated area (outdoors is best) and let it dry according to the product directions.
- Light it up. Set an LED tea light or a real tea light inside. Real candles must sit on a heat-safe plate or tray, away from curtains, and never be left burning unattended.
Why Tin Can Lanterns Are Trending This Fall
Tin can lanterns hit the sweet spot between zero-waste craft and real home decor. You are rescuing metal that would otherwise go to the recycling bin, and one evening of work gives you a set of lanterns you can bring out every fall. Punched dots read like fireflies in the dark, and the warm light flatters a porch, a mantel or a dinner table. The supplies are nearly free, which makes this a forgiving first metal-punching project, and because every pattern is drawn by hand, no two lanterns come out alike.
Pattern Ideas and Variations
Simple shapes punch best, so start with one easy motif and add detail once you are comfortable.
- Dot constellations: scatter stars and dots across the can like a night sky.
- Simple shapes: a pine tree, a crescent moon, or a row of small hearts.
- Painted cans: a coat of matte spray paint in amber, sage or cream looks polished.
- Twine-wrapped cans: wind jute around the middle for a rustic band.
- Handle options: wire for hanging from a hook, twine for an easy grip.
Troubleshooting: Dents, Stuck Ice and Sharp Edges
- Dents from hammering too hard: use light taps; the ice block supports the can and absorbs gentle force.
- Ice that sticks: run warm, not hot, water over the outside and wiggle the block free; never pry at it with a knife.
- Sharp edges: keep gloves on until every hole and the lid rim is sanded smooth.
- Holes that tear together: leave at least 1/4 in between holes and 1/2 in from the top and bottom edges.
- Wobbly handles: use 18-20 gauge wire, not thin craft wire, and hook it through two rim holes so it cannot slide.
Safety, Care and Gifting
- Punching: gloves on, can on a towel so it cannot slip, and fingers behind the hammer line.
- Candles: LED tea lights are safest; real ones belong on a heat-safe plate or tray, away from curtains, and never left burning unattended.
- Care: dry the inside after each use, store the lanterns somewhere dry, and check the rims for rough spots each season.
- Gifting: pair two lanterns with a pack of LED tea lights for a housewarming or hostess gift, packed in tissue so the handles do not bend.
Your Free Printable
The free printable PDF downloads in one click and puts the whole project on two pages for your kitchen table. Page 1 is a What You’ll Need checklist with 13 items covering every material, tool and safety supply. Page 2 is a Step by Step checklist with 10 short actions from washing the cans to lighting them safely. Print both, tape them up as you work, and tick off each line.
That is it: a free, cozy afternoon project and a set of lanterns you will reach for every fall. Punch a different pattern on each can; the mismatched glow looks best when they sit together. Have fun, and mind the hammer.