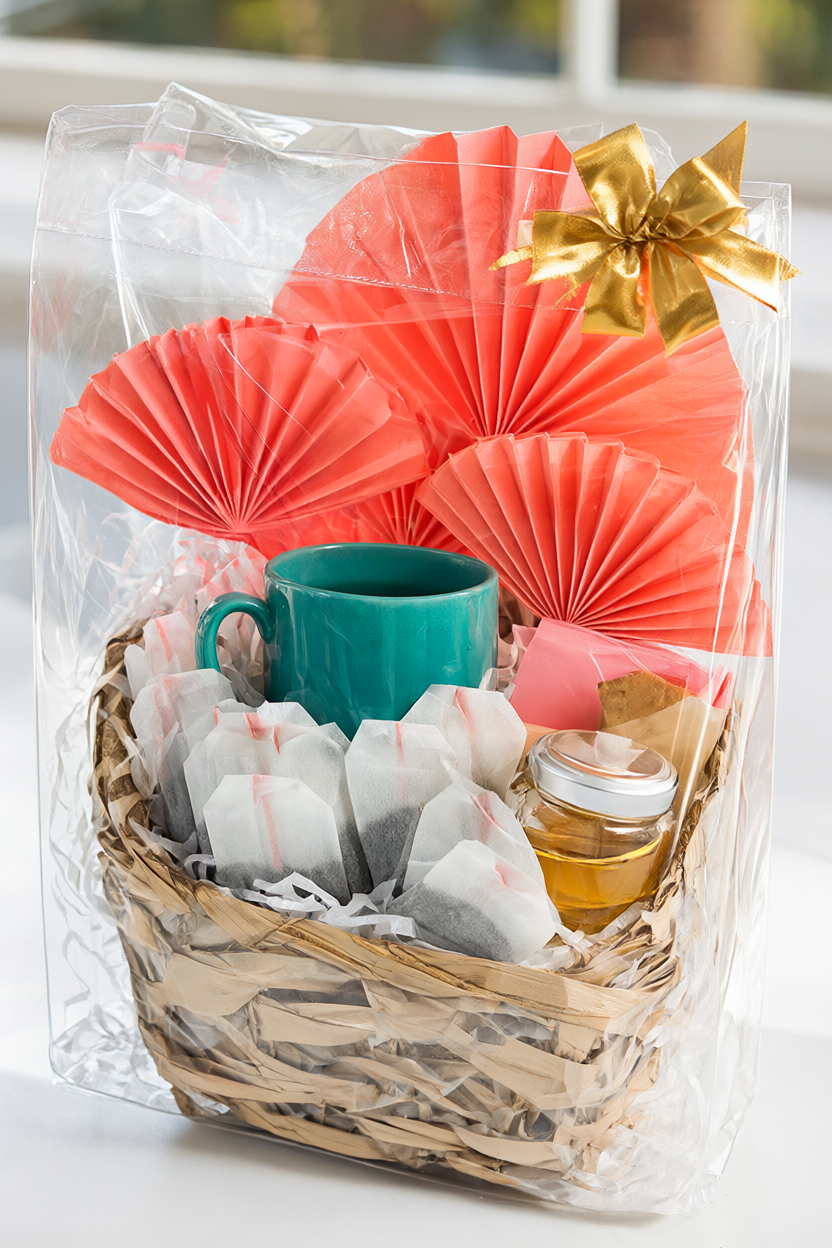
Turn a teal mug, sealed tea and treats, and two coral tissue fans into a colorful tea gift basket that is ready for hand delivery. With supplies ready, allow about 30 minutes of hands-on assembly, excluding shopping; there is no glue or drying time, and a free printable supply list is included.
At a Glance
- Difficulty: Beginner; simple folding and arranging.
- Hands-on time: About 30 minutes with supplies ready; shopping time excluded.
- Drying or curing: 0 minutes.
- Cost: Roughly $40–$65 at budget US retailers when buying all supplies and tools new, including full packages of wrapping supplies and tea. This is a planning estimate, not a checked local price. Reusing a suitable basket, tools, ribbon, or other supplies can bring the outlay closer to $20–$35.
What You’ll Need
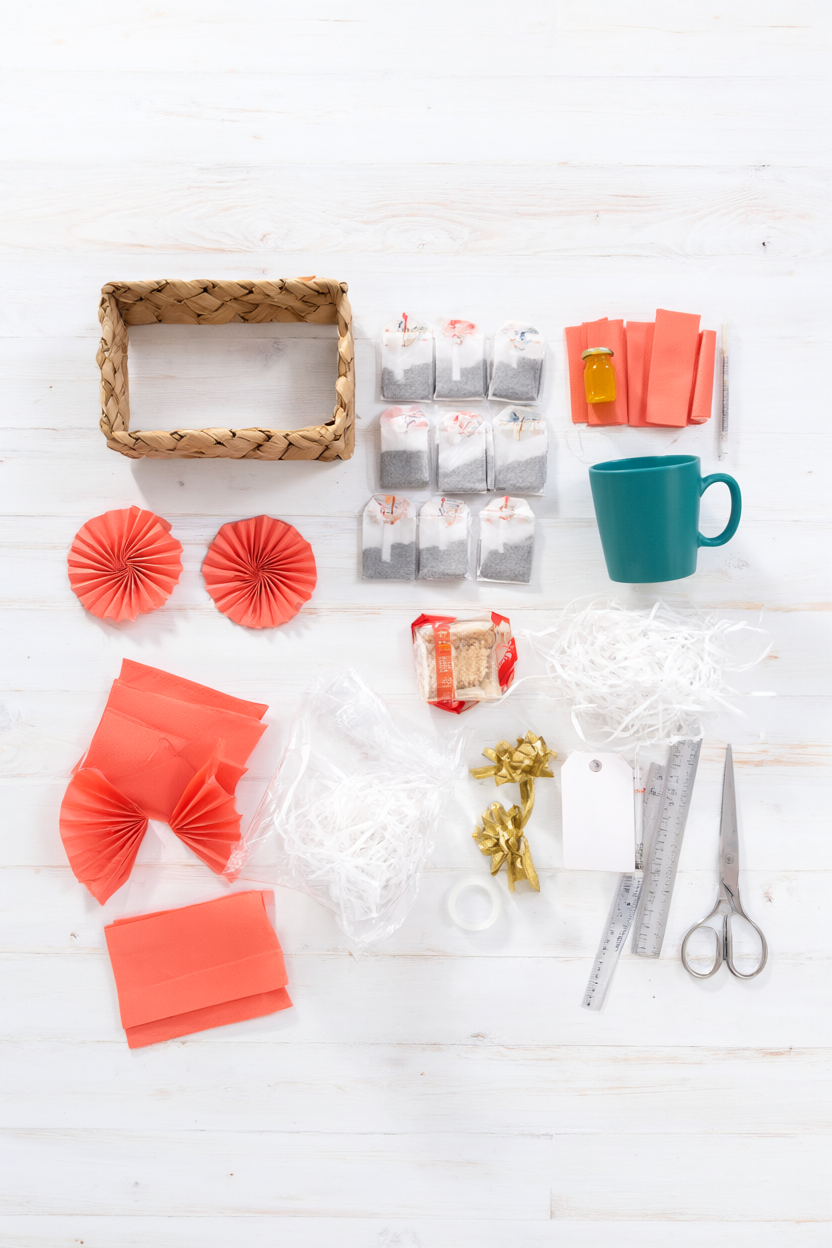
Choose a handle-free basket with enough room for the mug, an upright honey jar, and packaged cookies. The teal, coral, white, and gold palette gives the arrangement its cheerful finish; keep the food packaging sealed throughout assembly.
- 1 rectangular, handle-free basket, approximately 10 × 8 × 3 inches internally
- 1 teal ceramic mug, approximately 12 ounces
- 12 individually sealed tea bags, preferably 3 varieties with 4 bags each
- 1 factory-sealed honey jar, approximately 4 ounces
- 1 factory-sealed package of shortbread, approximately 3–5 ounces
- 4 sheets coral tissue paper, approximately 20 × 20 inches
- Approximately 3 ounces white crinkle-cut paper filler
- 1 clear gift basket bag, approximately 24 × 30 inches
- 1 length gold ribbon, approximately 36 inches long and ½ inch wide
- 1 prepunched white gift tag, approximately 2 × 3 inches
- Scissors
- Clear tape; use approximately 12 inches
- Pen
- Ruler
Step-by-Step Instructions
- Check the contents. Pick tea flavors the recipient enjoys, then check the dates on the tea, honey, and cookies. Consider dietary preferences before assembling the gift. Keep every food in its original sealed packaging, with ingredients and brewing directions available, so the recipient can see what is inside and how to prepare the tea.
- Test the fit before decorating. Set the mug, honey jar, and cookie package inside the empty basket. The honey needs to stand upright, and the cookies should fit behind the shorter items. Leave space around the mug instead of pressing the jar or packaging against it. Make this check before adding tissue or filler.
- Build a padded base. Line the basket with one coral tissue sheet. Loosely crumple a second sheet beneath the place where the mug will sit, then spread white crinkle-cut filler across the bottom to create about a 1-inch cushion. Keep the base softly padded rather than tightly compressed, with room to nestle the contents into it.
- Fold two tissue fans. Cut each of the two remaining tissue sheets into a 10 × 20-inch rectangle. Working along the 20-inch length, fold the paper back and forth in alternating 1-inch pleats, using the ruler to keep the folds even. Fold the resulting strip in half, tape its two inner edges together, and spread the outer edges into a semicircle. Repeat for the second fan. Keep fingers clear of the scissor blades; an adult should handle cutting if children help.
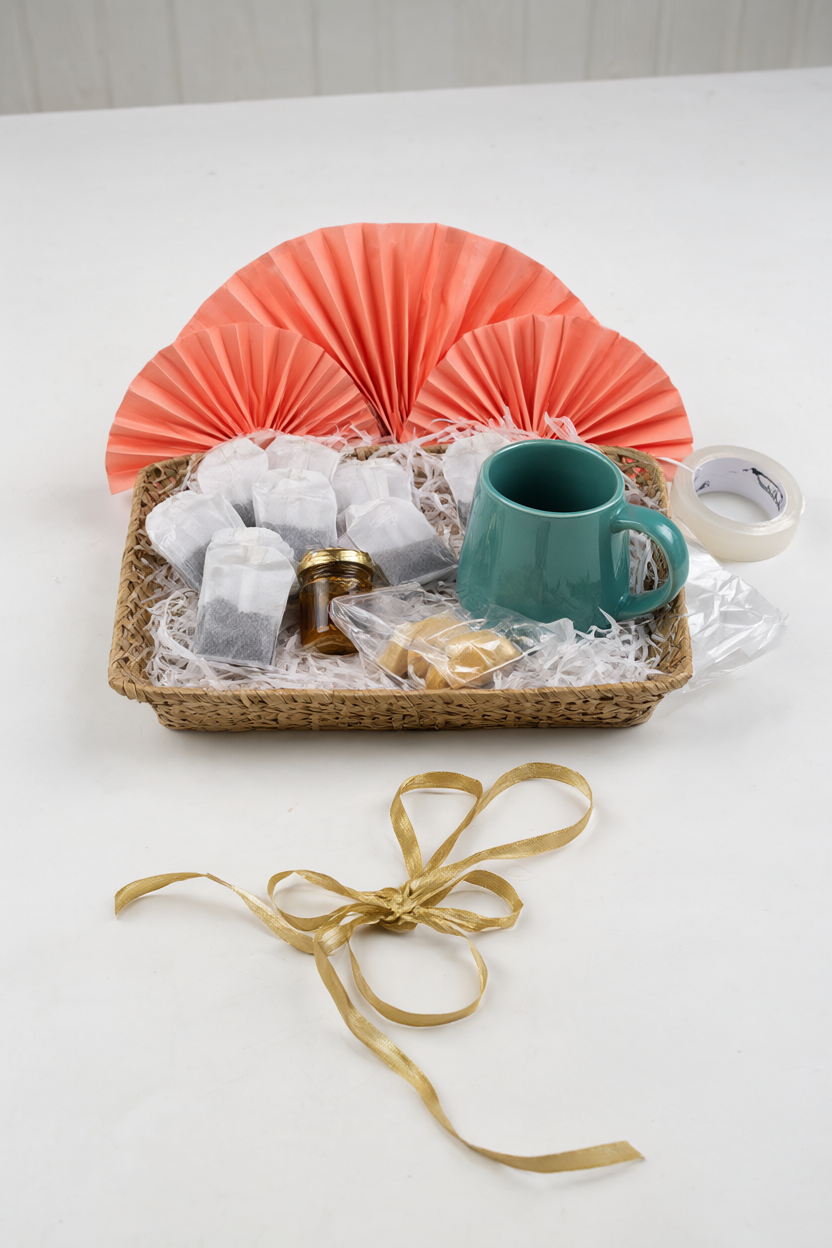
- Arrange the main items. Nestle the mug at the front left and the upright honey jar at the front right. Wedge filler between them so the glass and ceramic cannot touch. Stand the cookie package behind these shorter pieces, then tuck the tissue fans at the back. Bury their folded bases in filler while leaving the coral semicircles visible above the basket.
- Add the tea sampler. Place six sealed tea bags inside the dry mug. Arrange the other six in a slightly overlapping row in front of the cookies, with the flavor names facing outward. Add filler around the bases of the mug, honey, and cookies. Gently move the basket a few inches: the contents should stay upright, with filler still separating the jar and mug.
- Wrap the basket. Lower the arranged basket into the clear gift bag and gather the bag above the tallest item. Keep enough room around the fans for their pleats to stay spread, and check that the wrapping does not pull on the mug handle. Fold excess bag material underneath and secure those folds with clear tape. Keep the plastic bag away from babies and young children.
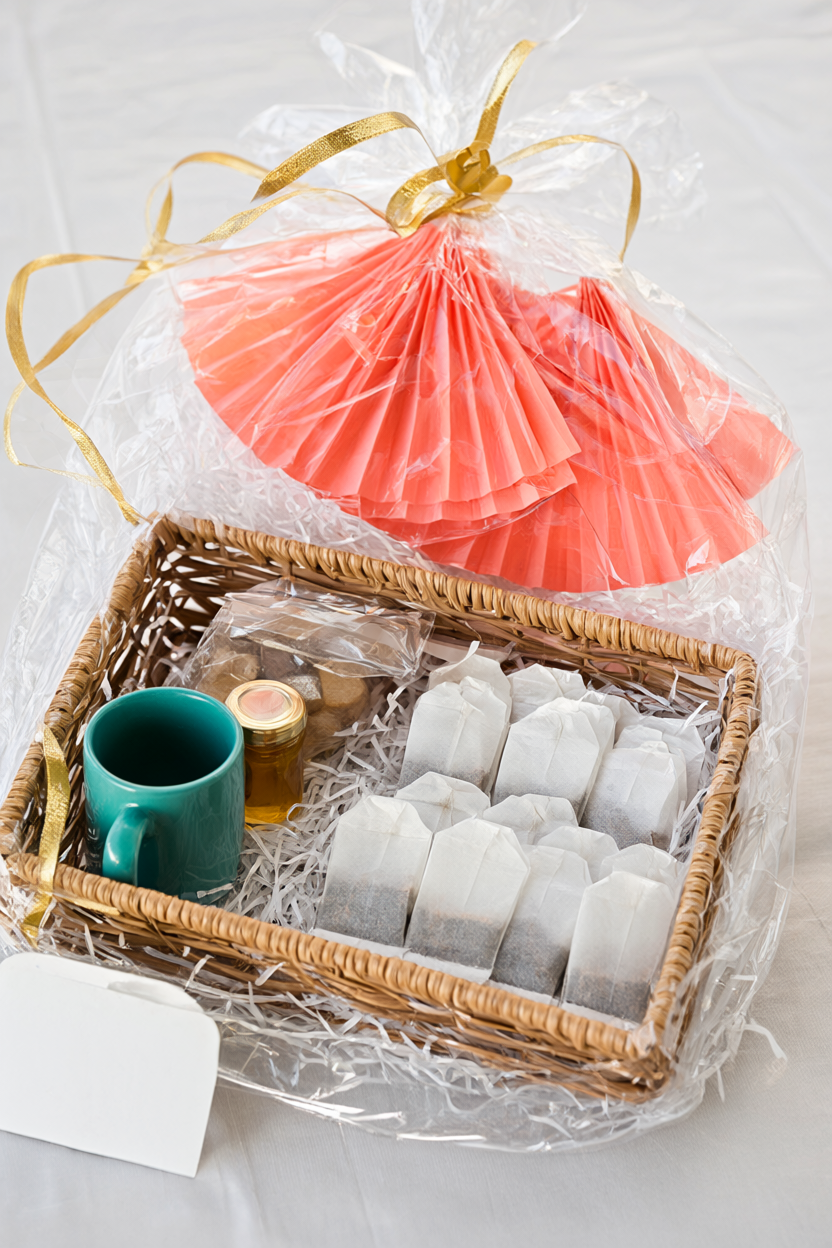
- Finish the gift. Write a short message on the white tag, thread it onto the gold ribbon, and tie the gathered bag with a bow. Check once more that the jar is upright and the fans are not squeezed. Carry the finished basket from underneath. This arrangement is intended for hand delivery; mailing it requires separate protective packing.
Make It Your Own
Bright morning-tea colors. Swap the teal mug for cobalt, use lemon-yellow tissue fans, and finish with white ribbon. Keep the same padded arrangement and varied heights so the mug, sealed treats, and fans all remain visible.
A caffeine-free selection. Choose three caffeine-free teas the recipient already enjoys. Replace the shortbread with their preferred sealed snack, checking the package information and date just as you would for the original contents.
A gift for two. Use two smaller mugs in a larger basket. Increase the filler and clear bag size to suit the larger arrangement, and test the fit before decorating so the mugs and honey have space between them.
Beginner Mistakes (and Easy Fixes)
- Buying a basket before checking the contents. Test the mug, upright honey jar, and cookie package together before adding filler. This makes it easier to spot a basket that is too snug.
- Packing everything at the same height. Place the tall cookie package and tissue fans behind the shorter mug and jar. The layered heights keep each part visible instead of hiding the tea behind the treats.
- Letting glass and ceramic touch. Wedge filler between the honey jar and mug, then check the gap after wrapping. Carry the basket from its base to support the arrangement.
Your Free Printable
The two-page PDF contains a complete shopping, materials, and tools checklist with quantities on page 1. Page 2 has fifteen short assembly actions covering padding, tissue fans, arranging, wrapping, and tagging. Keep it beside your supplies as you work through the basket.
Questions You Might Have
Can I use loose-leaf tea?
Yes. Include a suitable infuser and keep each tea in labeled, food-safe packaging with brewing instructions. The recipient should have the information and equipment needed to prepare the tea.
Can I make it ahead?
Yes; use the earliest best-by date among the foods as your limit. Store the basket somewhere cool and dry, away from sunlight, and keep the original sealed packaging intact.
Do I need cellophane?
No. For an unwrapped version, tie the tag to the basket rim and transport the basket upright in a snug box. Keep supporting it from underneath when you lift it.
Save This for Later
Save this tea gift basket idea for the next time you want a colorful, practical gift with a reusable mug.
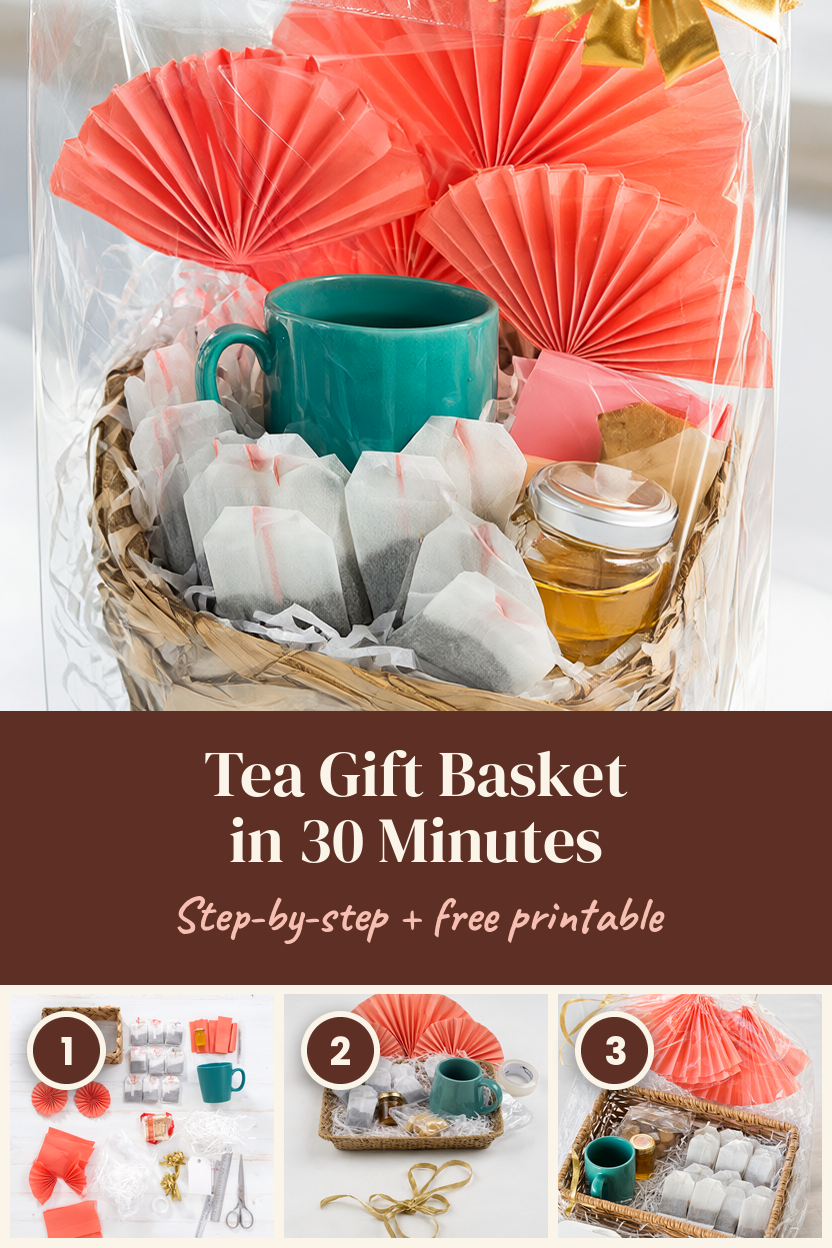
A final check of the sealed treats, softly padded contents, and spread coral fans leaves the basket ready to give. Add your message to the tag, tie the gold bow, and carry it from the base.