Somewhere in your closet or at the thrift store, there is a knit sweater that is about to become the coziest fall decoration in your home. These upcycled sweater pumpkins need no sewing, no fancy tools, and only about 25 to 30 minutes of hands-on time for each one. Below you will find the full step-by-step tutorial, and a free printable supply list and checklist is included so you can craft along without scrolling.
A word of warning before you begin: sweater pumpkins are wonderfully addictive. The whole project is simple tying and stuffing, so even a total beginner can finish a handsome set in one cozy afternoon.
At a Glance
- Difficulty: Easy and beginner friendly. There is no sewing at all, just simple tying and stuffing.
- Hands-on time: 25 to 30 minutes per pumpkin, or about 1.5 hours for a set of three.
- Drying or curing time: None. Your pumpkins are display-ready the moment you fluff them.
- Cost level: Very low. One thrifted sweater plus stuffing and twine makes several pumpkins.
What You’ll Need
Everything on this list is inexpensive and easy to find. A forgotten or thrifted sweater does the heavy lifting, and the rest comes from a basic craft stash. Here is everything to gather before you start.
- Old or thrifted knit sweater (wool, cotton or blend), 1
- Poly-fiberfill stuffing, 2 large handfuls per pumpkin
- Jute twine, about 1 m (or a few rubber bands)
- Cinnamon sticks or small twigs, 1 per pumpkin for the stem
- Fabric scissors
- Ruler or measuring tape
- Pencil or fabric chalk
- Hot glue gun and clear glue sticks (optional, for the stem)
- Dry rice or beans (optional, for a weighted pumpkin)
Step-by-Step Instructions
Work on a table with good light and a little elbow room. These steps describe one pumpkin, so simply repeat them for each pumpkin in your set. The whole process is cutting, tying, stuffing and wrapping, and none of it needs a needle.
- Pick an old or thrifted knit sweater; felted wool or a cable knit gives the coziest texture. Cut one sleeve off at the shoulder seam. Measure a 25-30 cm (10-12 in) tube from the upper sleeve with your ruler, mark it with a pencil or fabric chalk, then cut along the mark. Fabric scissors are sharp, so ask an adult for help if you are a younger crafter.
- On the cut end, pinch the fabric together and tie it tightly with a 30 cm piece of jute twine (or a rubber band) about 3 cm from the raw edge. Flatten the bunched fabric so it sits neatly.
- Turn the tube right side out so the tied end sits inside and the knit texture faces out.
- Stuff the tube with poly-fiberfill, one small handful at a time, until it is plump and holds a round shape (about two large handfuls for a 12 cm pumpkin). Optional: add a spoonful of dry rice first for weight.
- Pinch the open end closed and tie it tightly with twine about 2 cm from the edge; poke the raw edge down inside the opening with your fingers or a pencil.
- For classic pumpkin ribs, cut a 60-80 cm length of twine and wrap it over the outside from the top tie to the bottom tie, 4-6 times evenly, then tie it off and push the knot into the top opening. Squeeze the pumpkin between the wraps to plump the lobes.
- Tuck a cinnamon stick or small twig into the top opening as the stem. If it feels loose, add a dab of hot glue. Hot glue can burn skin, so an adult should handle the glue gun.
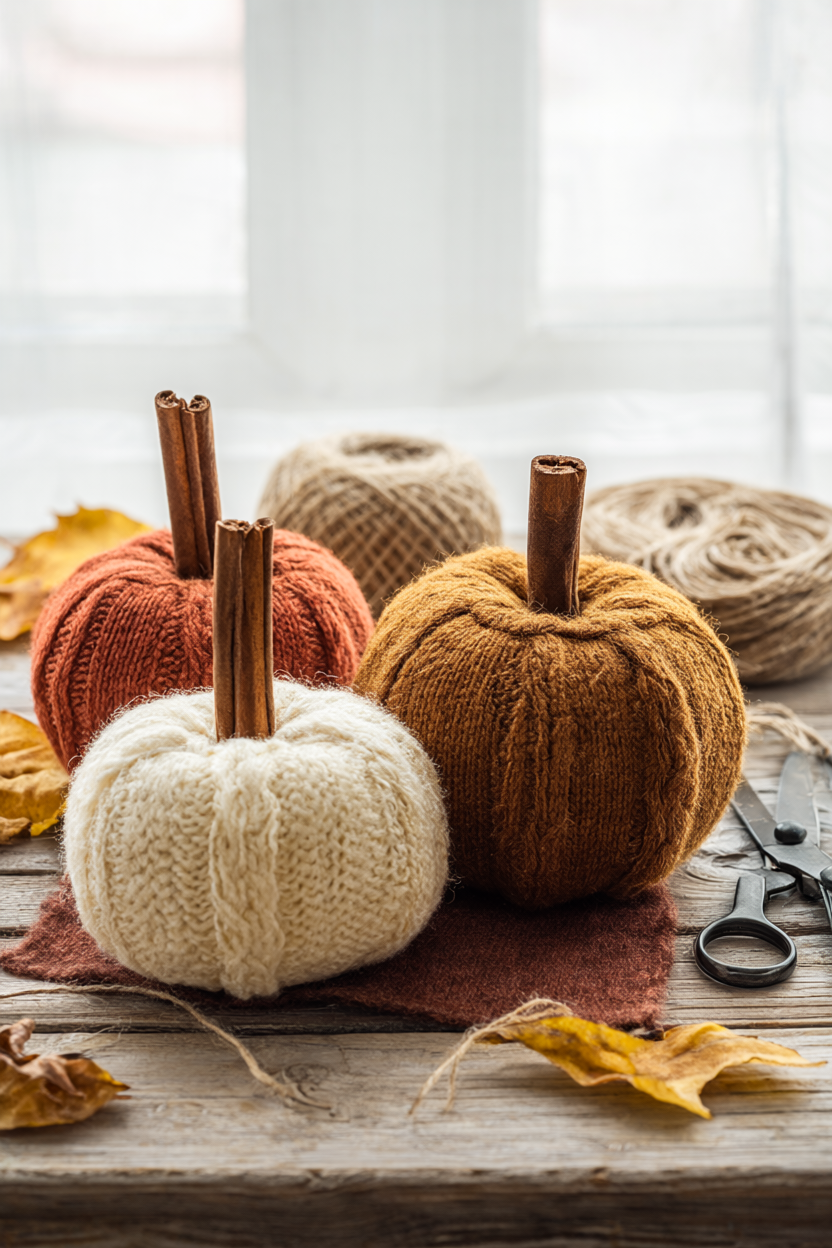
- Fluff and reshape the pumpkin with your hands, then repeat in cream, rust and mustard for a cozy fall vignette on a shelf, mantel or table.
Why Sweater Pumpkins Are the Coziest Fall Craft
Sweater pumpkins hit a sweet spot that few crafts manage: they look like boutique decor but cost almost nothing. A single thrifted sweater is usually a few dollars, and it holds enough fabric for three or four pumpkins. Because there is no sewing, no pattern and no drying time, you can start after dinner and have finished pumpkins on the mantel before bed.
The knit texture is what makes them special. Felted wool and cable knits read as soft and handmade, and the fabric already has the warm, lived-in look that new craft-store foam pumpkins lack. They are also wonderfully forgiving: a slightly lopsided pumpkin just looks charming, and any small mistake disappears the moment you add the ribs and stem.
Color Palettes and Styling Ideas
Classic fall colors are cream, rust and mustard, and a trio in those shades looks lovely on a shelf or entryway table. For a softer farmhouse look, stick to neutrals like ivory, oatmeal and greige. Want something moodier? Deep plum, forest green and charcoal feel modern, while bright orange and cream keep things playful.
For styling, group the pumpkin set of three together with a candle or a small stack of books, and let the different sizes do the work. Line a mantel with a mix of sweater pumpkins and real miniature pumpkins for contrast. At Thanksgiving, scatter a few down the center of the table around the serving dishes, or place one at each setting as a favor guests can take home.
Troubleshooting: Lumpiness, Slipping Ribs and Fraying Knits
If your pumpkin looks lumpy, the stuffing went in too fast. Pull it out, tease the fiberfill apart into smaller tufts, and add it a little at a time, pushing it into the sides as you go. For ribs that slip, use a slightly rougher twine and tie the top and bottom knots tight; a tiny dab of hot glue under the top knot also helps.
Fraying knits are normal, especially with loose weaves. Trim long threads with sharp scissors and tuck the raw edge deeper into the top opening. When choosing a sweater, look for a medium-weight knit: thin sweaters turn limp and see-through when stuffed, while chunky blankets or heavy coats are stiff and hard to tie. Cable knit and felted wool are the easiest to work with.
Care and Gifting Your Sweater Pumpkins
Sweater pumpkins are not washable, but they are easy to keep fresh. Dust them with a soft brush or a lint roller, and spot clean small marks with a barely damp cloth and a drop of gentle soap, then let them air dry. Keep them away from damp windowsills and direct heat.
After fall, store your pumpkins in a breathable cotton bag or a cardboard box with a sheet of tissue between them, away from moths and moisture. They also make a wonderful gift: tie a set of three together with twine and a small tag, and you have a thoughtful fall housewarming or hostess gift that costs very little.
Your Free Printable
The free printable contains two pages. Page 1 is a “What You’ll Need” checklist with all 9 materials and tools with quantities. Page 2 is a “Step by Step” checklist with the 8 short no-sew steps. Print it, check items off as you go, and keep it beside you at the craft table.
That is the whole project. Start with one sweater and one pumpkin, and by the time the leaves finish turning you can have a whole harvest of soft, ribbed pumpkins for pennies. Grab a sweater, pour something warm, and enjoy the coziest half hour of your fall.