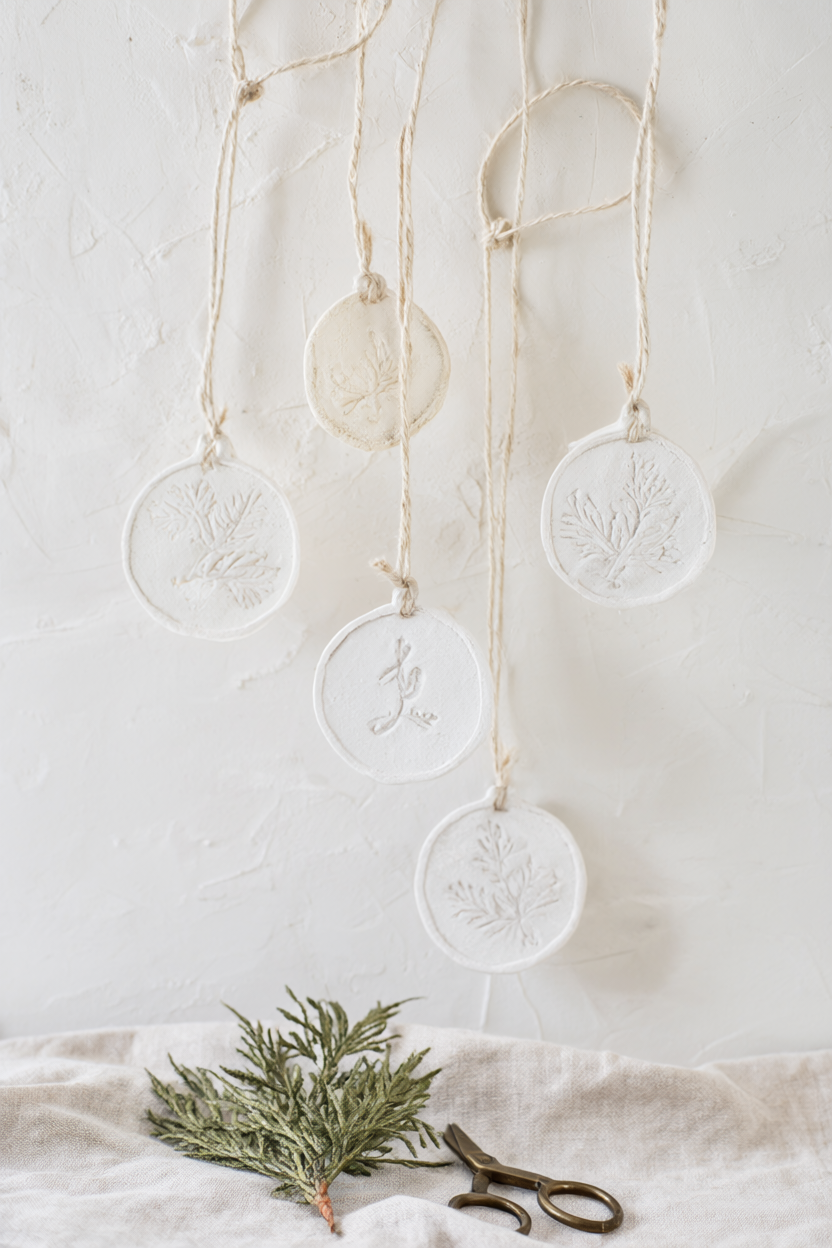
Making your own Christmas ornaments with air-dry clay is one of those projects that looks far more expensive than it actually is. In about 45 to 60 minutes of hands-on time, you can turn a single bag of clay, a few cookie cutters and your favorite rubber stamps into eight to ten keepsake ornaments that need no kiln, no oven and no special talent. The clay does the hard work while it dries, and a free printable supply list and step checklist is included below so you can gather everything before you start.
At a Glance
Here is the quick version before you commit an afternoon.
- Difficulty: Beginner, kid-friendly with adult help.
- Hands-on time: 45 to 60 minutes.
- Drying time: 24 to 48 hours flat at room temperature; optional paint and varnish add about 30 minutes plus label drying time.
- Cost level: Low, especially if you already own cookie cutters and stamps.
What You’ll Need
This list makes eight to ten ornaments, and most of it is probably already in a kitchen drawer.
- 1 lb (450 g) white air-dry clay (makes 8-10 ornaments)
- 2-3 holiday cookie cutters, 2.5-3.5 in
- 3-4 small rubber stamps (botanical, initials, or snowflakes)
- Cornstarch, about 1 tbsp (optional, keeps stamps from sticking)
- Rolling pin
- Parchment paper
- Ruler
- Drinking straw
- Flat board or cookie sheet
- 220-grit sandpaper
- Acrylic paint and a small brush (optional)
- Matte water-based varnish (optional)
- Twine or ribbon, 6 in per ornament
- Scissors
- Damp cloth
Step-by-Step Instructions
Set out a flat board and read through the steps once before you begin.
- Knead the clay for 1-2 minutes until smooth and pliable. If it crumbles, add water a few drops at a time and keep kneading.
- Roll the clay between two sheets of parchment to an even 1/4 inch (6 mm), checking the thickness with a ruler in a few spots so the ornaments dry evenly.
- Cut shapes with cookie cutters, pressing straight down without twisting. Lift the cutter, peel away the scraps and re-roll the scraps once.
- Smooth the cut edges and fingerprints with a barely damp fingertip, blotting any excess water so the clay does not get sticky.
- Press a rubber stamp firmly into each shape and lift it straight up. Dust the stamp with cornstarch first if it sticks.
- Poke a hole 1/2 inch below the top edge with a drinking straw and wiggle it gently so the hole stays open. An adult should do this for young kids.
- Dry the ornaments flat on a board at room temperature for 24-48 hours, longer in humid weather, and flip them after 12 hours. They are ready when they feel light and no longer cool.
- Sand the edges with 220-grit sandpaper over a sheet of parchment paper, then wipe off the dust with the damp cloth and let the ornament dry fully before painting.
- Paint the stamped motifs, edges, or the year on the back with acrylic paint, letting each thin coat dry 20-30 minutes.
- Seal both sides with matte water-based varnish in a ventilated room if you want a wipe-clean finish, and let it dry per the label.
- Thread 6 inches of twine through the hole, tie a loop, and trim the ends.
Why One Bag of Clay Makes Eight to Ten Ornaments
A single 1-lb (450 g) bag of clay makes eight to ten ornaments, which comes to a few dollars each once you own the basics. No kiln or oven is needed, so the project fits into an afternoon instead of a whole weekend.
The stamps do the decorating, so there is no painting skill required, and small imperfections read as handmade rather than messy. That combination of low cost, low gear and a short supply list is why this project works for a first-time maker and for a family afternoon alike.
Variations: Initials, Handprints, and Two-Tone Paint
A few easy changes keep the project fresh once you have made your first batch.
- Initials or names: press a single letter stamp in the center, or spell a short name with letter stamps and keep them straight with a ruler.
- A child’s handprint: press a small hand into a flat circle of clay, then stamp the year beside it; an adult should help position the hand.
- Two-tone paint: paint the stamped areas one color, let them dry, then wipe the raised surface with a barely damp cloth.
- Terracotta clay with white highlights: use terracotta clay, then dry-brush white acrylic over the raised areas.
- Mini ornaments as gift tags: cut smaller shapes and tie them to packages in place of a paper tag.
Troubleshooting: Crumbly Clay, Curled Edges, and Smudged Stamps
- Crumbly clay: add water a few drops at a time and knead longer; a teaspoon of water worked in slowly usually revives older clay.
- Curled or cracked ornaments: roll to a consistent 1/4 inch, dry away from direct heat, and flip after 12 hours.
- Smudged stamps: press straight down and lift straight up; rocking the stamp or using too much cornstarch blurs the edges.
- Holes that close: re-poke after an hour and again before bed; twisting the straw gently keeps the opening round.
- Streaky paint: use thinner coats and let each one dry fully; thick paint pulls and streaks.
Care, Safety, and Gifting Your Ornaments
Store finished ornaments in tissue paper inside a dry box, away from damp basements and windowsills. Air-dry clay is sturdy but not waterproof, so keep these as indoor ornaments.
Supervise children, have an adult handle the straw hole for young kids, sand over a sheet of parchment paper, and varnish only in a ventilated room. Keep small stamps and twine away from toddlers.
To gift them, stack one or two in a small box with tissue, add twine and a handwritten tag.
Your Free Printable
The free PDF is two pages. Page 1 is a “What You’ll Need” checklist with 15 materials and tools, including optional paint and varnish. Page 2 is a “Step by Step” checklist with 11 short steps from kneading to hanging.
There is something satisfying about an ornament that started as a lump of clay an hour earlier. Make a batch this weekend, and you will have keepsakes that come out of the box every December.