A handwritten letter is one of the few things you can send that someone will hold in their hands, read twice, and keep. This free pen pal letter template kit takes the pressure out of writing that first letter: a guided letter page, a send-it checklist, and a profile sheet for the details. Print the three pages and you can go from a blank page to a sealed envelope in one sitting.
What’s inside the printable
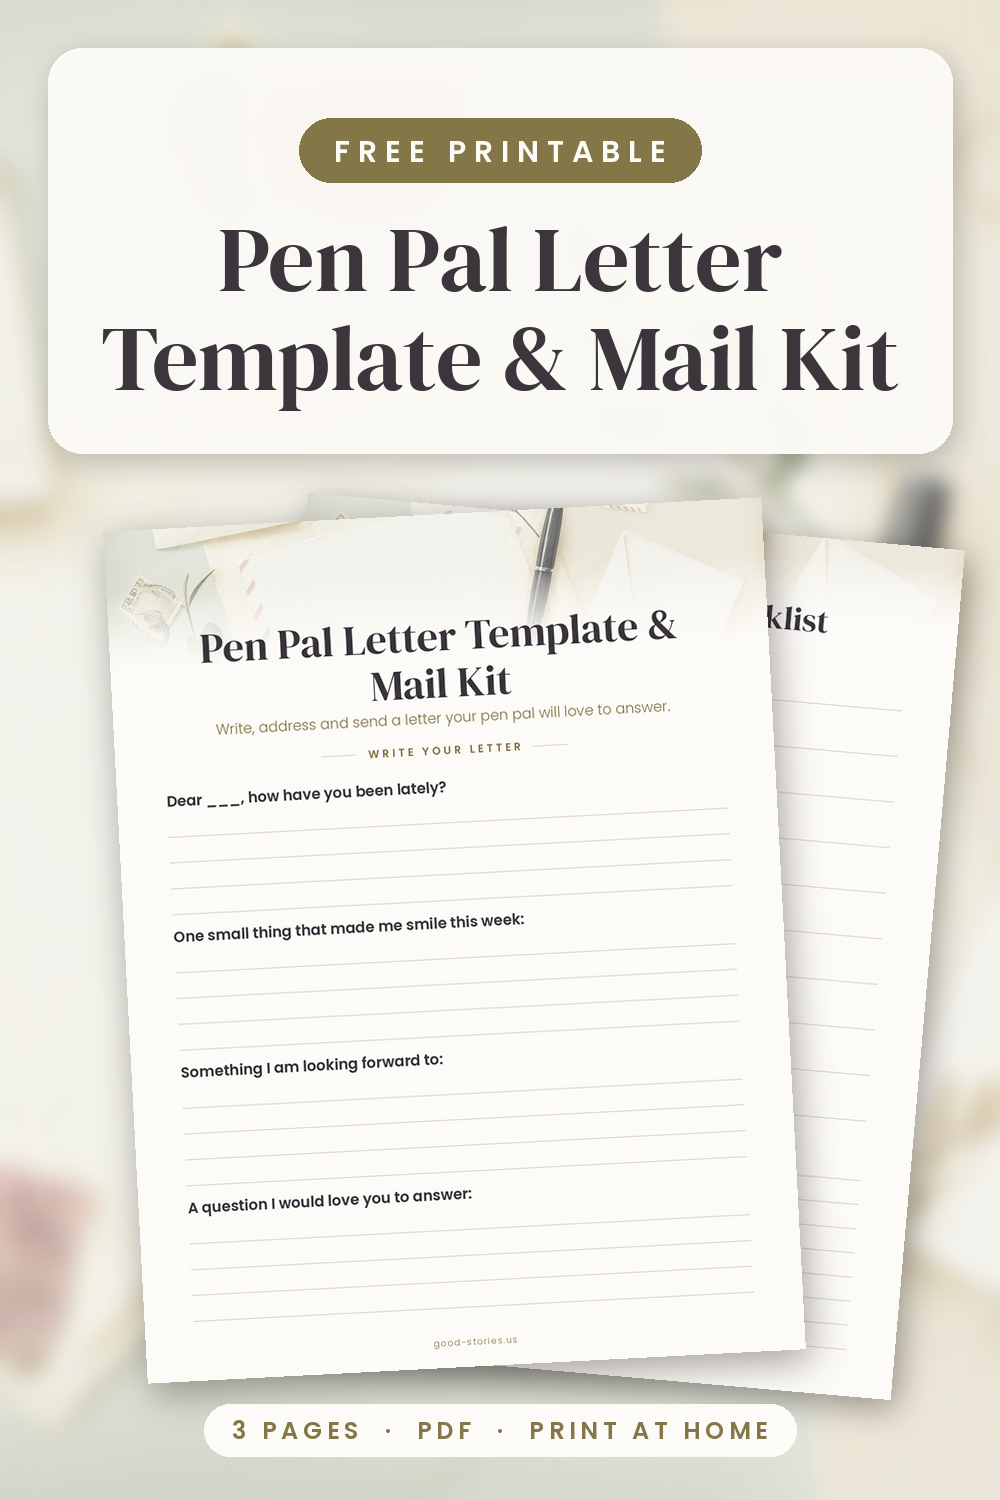
- Page 1: a guided letter template with four prompts and writing lines.
- Page 2: a ten-step send-it checklist that goes from writing the letter to mailing it.
- Page 3: six profile boxes for your pen pal’s details and your letter dates.
Why a handwritten letter is worth the ten minutes
Most of what we send each day is read in a second and gone. A letter asks for a little more: ten minutes, a pen, a stamp. In exchange, it arrives as an object, something with handwriting on it, a postmark, maybe a smudge where the ink was still wet. It sits on a table until someone has time for it, and it gets read again later.
That is also why letters are so easy to answer. A letter gives your pen pal something to reply to. It carries your voice, your handwriting, your small news, and it does not demand an instant response. If you have ten minutes and a stamp, you have everything you need to start.
The five parts of a friendly letter
Every good letter has the same five parts: the date, a greeting, the body, a closing, and your signature. Keep the whole thing to one or two sides of the page. A short letter that is warm and specific beats a long one that runs out of steam.
Write the date in the top corner so your pen pal knows when you wrote it. Open with a greeting that sounds like you: “Dear Marisol,” is plenty. The body carries your news, a thought or two, and your questions. Close with something simple like “Warmly,” and sign your name. That is the whole structure, and the rest is just what you have to say.
Fill the page with prompts
The blank part of a letter is where most people stall, so let the printable page carry you. It gives you four prompts with room to answer each one: an opening greeting, one small thing that made you smile this week, something you are looking forward to, and a question you would love your pen pal to answer. Write a sentence or two under each and you already have a full page.
Then close with two or three easy questions of your own: what are you reading, what is the weather like where you are, what did you cook this week. Questions that can be answered in a line or two get replies. Questions that ask for an essay usually do not.
Address the envelope right
Addressing is where a lovely letter can go astray, so give it a minute of real attention. Put the recipient’s name and full address in the centre of the envelope, with the street, city, state, and ZIP on separate lines. Put the stamp in the top right corner and your own return address in the top left. Leave a clear margin around the address so sorting machines can read it.
For international mail, add the country name in capital letters on the last line and check the postage for that destination. Take a photo of the finished envelope before you seal it, especially with a new pen pal, so you have a record if anything goes missing.
Send, log, and keep the thread
The send-it checklist on page two is the unglamorous part, and it is the part that gets letters into mailboxes. Run down the ten steps before you seal the envelope: write your letter, add the date, fold it, address the envelope, add your return address, choose a stamp, tuck in a small extra like a sticker or a photo, seal it, check the postage, and mail it.
Then note the date you sent it. The profile page on page three is where you keep your pen pal’s mailing address, birthday, the things they love, the last letter you sent, and whether you are waiting for a reply. When an answer arrives, add the date it came. Six months later, that little log is what keeps the thread going instead of letting it quietly drop.
How to use your printable
Print the pages on US Letter paper. If your printer is loaded with A4, choose “Fit to page” in the print dialog so nothing runs off the edge. Black-and-white printing works perfectly well, because the design is built to stay readable in plain ink.
Print page one fresh for every letter and keep a small stack in your stationery drawer. Keep pages two and three somewhere durable, like a folder or a notebook pocket, since they are reference pages you will reach for again and again.
A few ways to put the kit to work: write to a friend who moved away, pair it with a stamp and a nice pen as a small gift, use it in a classroom or library letter-writing club, or keep a set with your journal and write one letter a month. Fill in the profile page after your pen pal’s first reply, when you know their address and a few of their favourites.
The best pen pal letters are not the polished ones; they are the ones that get sent. Print the kit, answer the prompts in your own words, and put the envelope in the mail this week. The reply that comes back is worth far more than the ten minutes it took.