Crystal grids look complicated from the outside, but at their heart they are a simple, gentle practice: a handful of stones placed in a pattern, one clear intention, and a quiet moment to yourself. This guide walks you through planning your first grid without spending a fortune or memorizing anything, and the free printable worksheet included below gives you space to write your intention down and sketch your layout before you place a single stone.
This printable is not a substitute for professional help.
What’s inside the printable
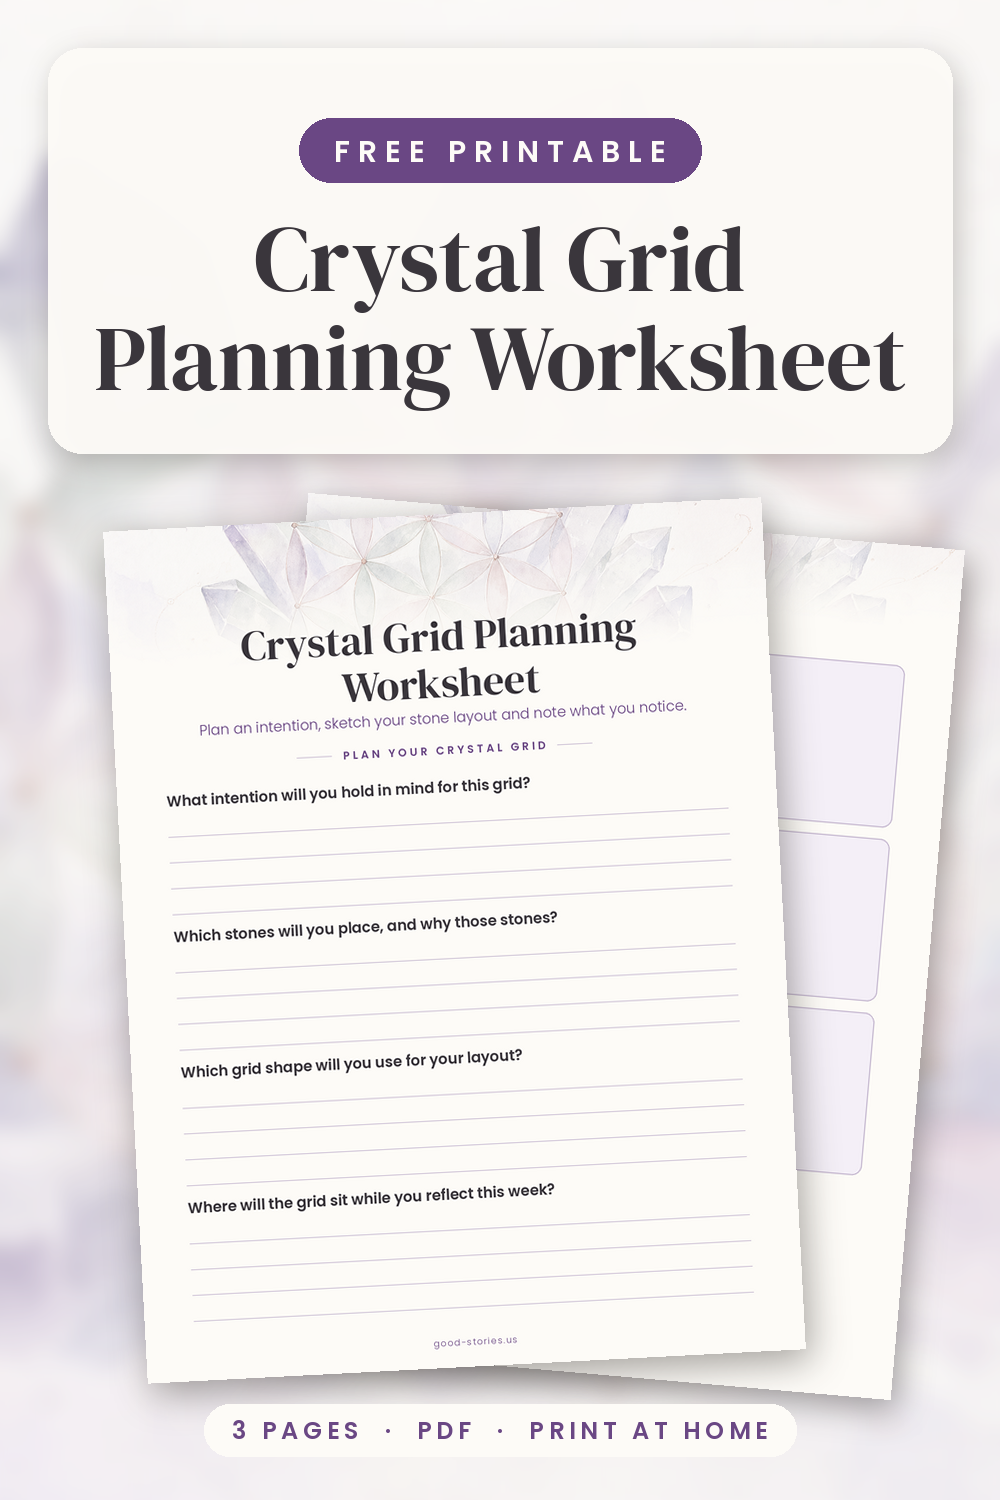
- Page 1: four lined prompts to plan the intention, stone choices, grid shape and where the grid will sit.
- Page 2: seven blank boxes (center stone plus six outer stones) for sketching the grid layout.
- Page 3: three lined reflection prompts to record what you noticed after sitting with the grid.
What a Crystal Grid Actually Is
A crystal grid is simply a group of stones arranged in a geometric pattern around a center stone. Common patterns include the seed of life, the flower of life, a spiral, and a star. Many people use a grid as a visual focus for an intention: you decide what you want to hold in mind, arrange the stones with care, and then sit with the arrangement for a while.
Nothing about the practice requires special training, an expensive collection of crystals, or a permanent space in your home. You can build a grid on a coffee table, on a tray, or on a cloth that you fold away afterward. It works best when you treat it as quiet reflection time rather than something you have to get right.
Choosing Stones for a Beginner Grid
Clear quartz is the most common center stone in beginner grids, partly because it is easy to find and relatively affordable. For the outer stones, many people choose amethyst, rose quartz, and citrine; in crystal traditions they are associated with calm, warmth, and optimism respectively. Those associations are cultural traditions, not health claims, and you are free to choose stones because you like their color or because they were a gift. The printable’s first page asks why you chose each stone.
You do not need to buy anything for your first grid. Six small stones plus a center stone is plenty, and tumbled stones work just as well as points. If you only have three or four stones, build a smaller grid. A grid with four stones placed thoughtfully will teach you more than a hurried one built from twenty.
Picking a Layout You Can Sketch
The seed of life is seven overlapping circles, which makes it easy to translate into seven stones: one in the middle and six around it. A flower of life grid usually adds another ring of six stones outside the first, so you would need thirteen stones in total, or you can stop at seven and still have a complete, recognizable pattern. Star layouts use fewer stones placed at the points of a star, and a spiral layout grows outward from the center one stone at a time.
Before you place anything, count your stones and sketch the arrangement on paper. This is the step most people skip, and it prevents the frustrating moment when you run out of stones three-quarters of the way around a circle. Lay your stones on the sketch first, adjust the spacing until it looks even, and only then move the arrangement to its final surface.
Building the Grid Slowly, Stone by Stone
Choose a clear surface where the grid will not be knocked over: a shelf, a side table, or a tray that you can move. Set the center stone first, because everything else is placed in relation to it. Then add the outer stones clockwise, one at a time, pausing to look at the whole arrangement between each one. Work at whatever pace feels natural.
Once the stones are down, write your intention in the printable rather than leaving it in your head. A sentence or two is enough. Then sit with the grid for five or ten minutes without doing anything else. This is the part that turns a decoration into a practice, and it is also the part that is easiest to skip on a busy day. If you only have three minutes, sit for three minutes. Consistency matters more than duration.
Using the Printable to Plan and Reflect
The first page of the worksheet walks you through the planning stage: the intention you want to hold, the stones you have chosen and why, the shape you want to use, and where the grid will sit during the week. Fill this in before you touch a stone, because writing it down forces you to be specific. A vague wish is easy to forget; a sentence you can read back on Thursday is much harder to ignore.
The second page is the sketch page, with seven boxes for the center stone and six outer stones. Use a pencil so you can move things around, and number the boxes in the order you plan to place the stones. The third page is for notes after you have spent time with the grid: what you noticed while placing the stones, what thought kept returning, and one small action you want to take during the week.
How to use your printable
Print the worksheet on US Letter paper. If you are printing on A4, choose “Fit to page” in your print dialog so the boxes and lines stay inside the margins instead of clipping at the edges. Print single-sided if you can, so the sketch page lies flat next to your grid while you work.
A few practical ideas: keep the plan page on the same table as your grid so you can glance at your intention, use a pencil on the sketch page so you can adjust stone positions, and slide the notes page into a folder at the end of the week. The worksheet is reusable, so print a fresh copy for each new intention and keep the completed pages as a record of what you noticed over a few months.
A crystal grid does not need to be elaborate, expensive, or perfectly arranged to be worth your time. A center stone, six stones around it, a written intention, and a few quiet minutes are enough to make the practice your own. Print the worksheet, sketch a layout, and see what you notice.